Now that the API exists, it is time to create the Backbone application.
The full code for the application is available. More so than in the previous steps in the series, there is a lot more content in the application than is shown below. Looking through the full source provides a much more complete context for how the application works.
The Application
The application consists of a site backed by Backbone that uses Bootstrap for styling and Handlebars for rendering templates.
Page Containers
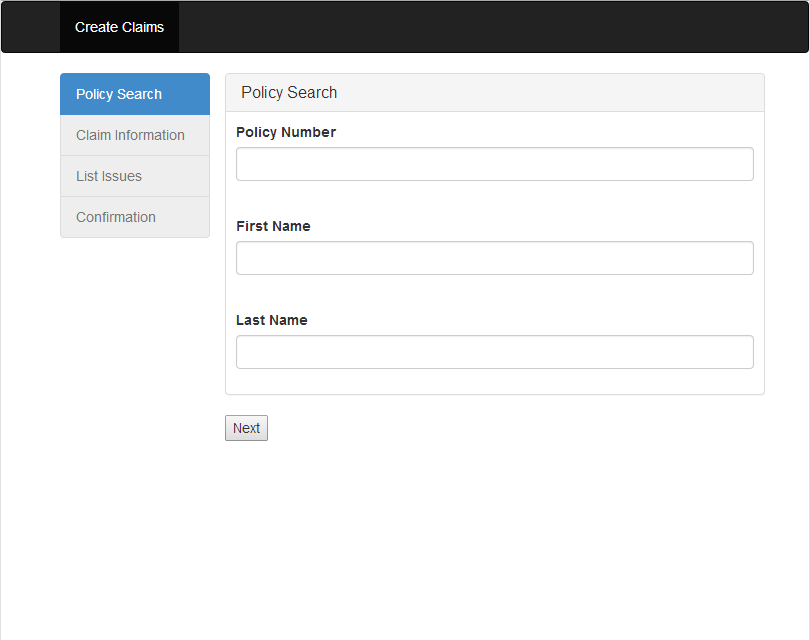
The main goal of this series it to create a multi-step workflow in Backbone. To support this, the index page for the application has a content placeholder for the overall workflow.
<div class="container">
  <div class="row" id="main-workflow">
  </div>
</div>
Likewise, the view template for the workflow (in its entirety) contains a placeholder into which the template for each workflow step view’s template is loaded. Additionally, the workflow’s view template contains a listing of the steps in the workflow to indicate what the current step is and how many steps remain.
<div class="container">
  <div class="col-sm-3 col-md-2 sidebar">
    <ul class="list-group">
      <li id="planSearch" class="list-group-item disabled">Policy Search</li>
      <li id="basicInformation" class="list-group-item disabled">Claim Information</li>
      <li id="issues" class="list-group-item disabled">List Issues</li>
      <li id="confirmation" class="list-group-item disabled">Confirmation</li>
    </ul>
  </div>
  <div id="main-content-container" class="col-sm-9 col-md-8">
    <div class="row">
      <div id="main-content"></div>
    </div>
  </div>
</div>
Defining the Application
The Backbone application is defined in app.js. The application (along with the rest of the code in the site) is setup as a require.js module. The code includes all of the required dependencies for the application then (once they have been loaded) starts the Backbone application.
require(["./appRequireConfig"], function() {
  require(["jquery", "bootstrap"], function() {
    require(["backbone", "app/appRouter", "app/service"], function (Backbone, AppRouter) {
      app = new AppRouter();
      Backbone.history.start();
    });
  });
});
The application code is added by referencing require.js from the index page. This loads the require.js script and provides the location of the main entry point into the application code to require.js.
<script data-main="js/app" src="lib/require/require.js"></script>Referencing Libraries (and Defining Dependencies)
The configuration for modules to load is defined in appRequireConfig.js. This file is separate from the application definition to allow it to be used when adding tests (as shown in a later post).
The configuration contains three main sections: alias to paths within the application, paths to libraries, and shims. The shims are used to reference libraries that do not natively support Require.js (or other AMD frameworks).
Backbone Routing
As previously mentioned, the workflow itself manages its own transitions between steps. So, the routing for Backbone application only needs to contain enough logic to route the application to the workflow and start it.
Backbone.Router.extend({
  routes: {
    "": "createClaim",
    "createClaim": "createClaim"
  },
  createClaim: function () {
    var that = this;
    require(["views/createClaim", "workflows/createClaim"], function (CreateClaimView, CreateClaimWorkflow) {
      var model = new CreateClaimWorkflow();
      that.loadWorkflow(new CreateClaimView({model:model}));
      model.start();
    });
  },
  loadWorkflow: function(view) {
    if (this.view) {
      this.view.remove();
    }
    this.view = view;
    $("#main-workflow").html(this.view.render().el);
  }
});
Workflow Routing
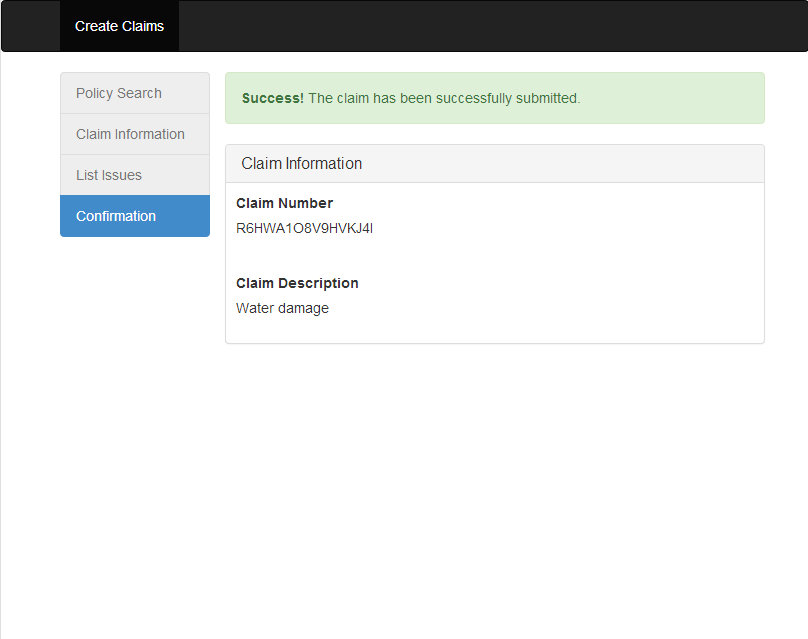
The workflow class defines a list of steps (in order) that are executed. Transitions are managed by calling the next function which will increment the step index, update the name of the current setup, and call its associated function. The workflow assumes that for each listed step there exists a corresponding function with the same name.
Backbone.Model.extend({
  workflowOrder: [
    "planSearch",
    "basicInformation",
    "issues",
    "confirmation"
  ],
  initialize: function() {
    this.currentIndex = -1;
  },
  start: function(data) {
    this.next(data);
  },
  next: function(data) {
    this.currentIndex++;
    this.currentStep = this.workflowOrder[this.currentIndex];
    this[this.currentStep](data);
  },
  // ...
});
Workflow Steps
A workflow step consists of three actions: creating the model for the step, creating the view for the step, and loading the view into the step placeholder of the workflow template.
planSearch: function(data) {
  var model = new PlanSearch({}, {workflow:this});
  this.loadView(new PlanSearchView({model:model}));
},
The loadView function takes the view for the individual step, renders it, and loads it into the placeholder included in the template for the overall workflow view.
Models
Each model is passed a reference to the workflow in its initialize function. This reference is stored and made available for other operations that trigger workflow activity.
Backbone.Model.extend({
  initialize: function(attributes, options) {
    if (options) {
      this.workflow = options.workflow;
    }
  },
});
The models for each step contain some method that advance the workflow once some condition (validating the data, performing AJAX calls, etc.) is met. This allows the model to direct the workflow to advance whenever the model’s operations are complete.
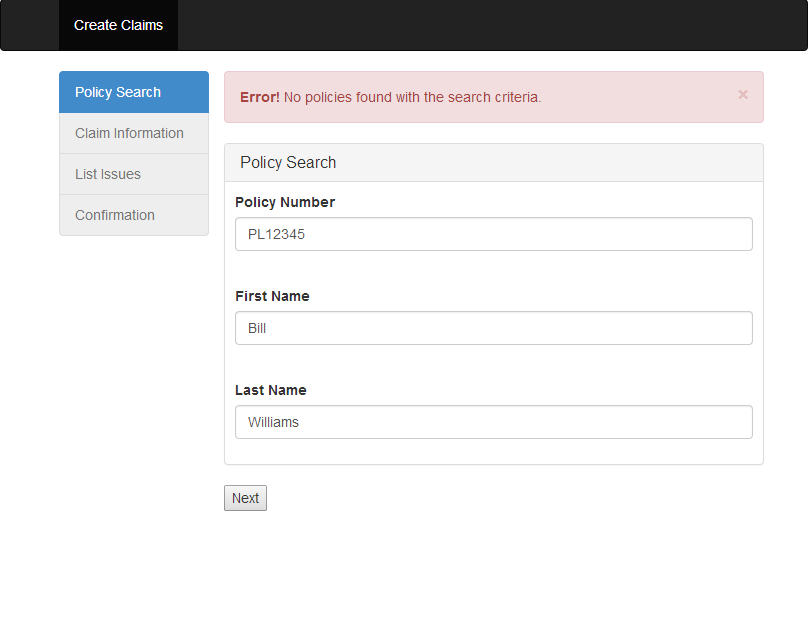
search: function(errorCallback) {
  var that = this;
  var searchModel = {};
  // ...
  $.ajax({
    url: SERVICE_API + "policies/search",
    type: "POST",
    data: JSON.stringify(searchModel),
    contentType: "application/json; charset=utf-8",
    dataType: "json",
    success: function(data) {
      if (!data || data.length == 0) {
        errorCallback("No policies found with the search criteria.");
      } else if (data.length > 1) {
        errorCallback("Found more than one policy with the search criteria.");
      } else {
        that.workflow.next(data[0]);
      }
    },
    error: function(e) {
      errorCallback(e.responseText || "An error occurred.");
    }
  });
}
Views
The views reference externally defined templates. These are imported as text and then compiled at time of initialization. For this application, the views are defined using Handlebars syntax.
var $ = require("jquery"),
    Handlebars = require("handlebars"),
    Backbone = require("backbone"),
    template = require("text!templates/planSearch.html");
return Backbone.View.extend({
  tagName:"div",
  initialize: function() {
    this.template = Handlebars.compile(template);
  }
});
For most views, the rendering function simply calls the compiled template passing it a JSON formatted representation of the model. The result of the template call are loaded into the target element.
render:function (eventName) {
  $(this.el).html(this.template(this.model.toJSON()));
  return this;
}
Handling Events
To handle events such as submitting the form (to navigate to the next step), the view is setup to subscribe for the event and handles it by updating the model with the data from the view and calling the function on the model that will either advance the workflow or report errors. If the model advances the workflow, the view is done. Otherwise, in the case of errors, the view displays the errors and same step remains displayed.
events: {
  "submit form":  "submitSearch"
},
submitSearch: function(e) {
  var that = this;
  e.preventDefault();
  var button = this.$el.find("#submit");
  button.prop("disabled", true);
  this.updateModelFromView();
  this.model.search(function(message) {
    var alertView = new ErrorAlertView({model:message});
    that.$el.find("#form-errors-container").append(alertView.render().el);
  });
  button.prop("disabled", false);
},
updateModelFromView: function() {
  this.model.set({ policyNumber: this.$el.find("#policyNumber").val() });
  this.model.set({ firstName: this.$el.find("#firstName").val() });
  this.model.set({ lastName: this.$el.find("#lastName").val() });
},
Adding the Application to nginx
In order to get around XSS problems, the application needs to be added to the same site that holds the reverse proxy to the Node server. To add the application to the site, add a link from /var/www/example to wherever the application code resides. From there, adding application as a location in the configuration file makes it available on the same (reverse proxied) port as the Node server.
	location /app {
		root /var/www/example;
		expires	off;
		add_header Cache-Control no-cache;
		index	index.html;
	}
Accessing the Application
Once the application is added to the nginx configuration, it is available on port 9000 (along with the API): the application at /app and the API at /api.
You Might Also Like
