

There is an awkwardness in defining the solution for a software project. Some projects define the solution by generating a backlog of features to implement. They specify what should be built, but create few insights about the user’s experience. To bring in the user’s perspective, teams often start by emphasizing the visual experience with clickable prototypes.
These screen designs are great for conveying a project’s vision, but relying on them limits collaboration to the select team members skilled with design tools. Discussions get bogged down with debates on layout, color, and wording at the expense of working through the biggest risks.
Sometimes you need a minimal, accessible way that is in between these approaches – a breadboarding prototype allows the right people to “kick the tires”, validate assumptions, and clearly define next steps.
Use Breadboards For Minimalist Prototyping
Breadboarding is a method used to quickly diagram what users can do and how they will progress through an application. It fits well the needs of a prototype–the simplest thing you can build to learn about a critical assumption. Because it’s fast, breadboarding allows you to explore multiple aspects and competing ideas. The diagrams use only words and lines. This allows anyone in the project, regardless of drawing skills, to participate during a critical part of the design process.
There are three basic items:
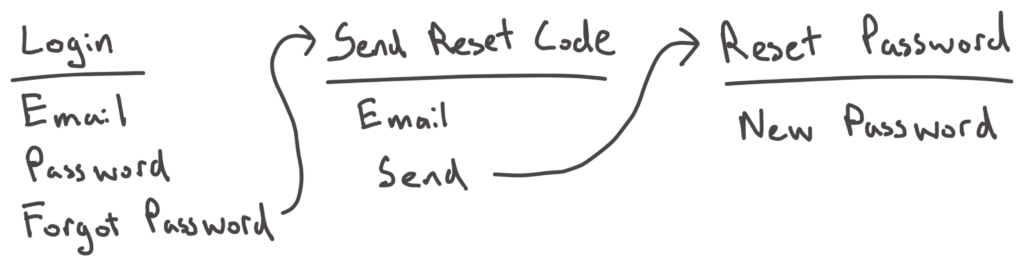
- Places. Something you can navigate to, like a screen or dialog. Represented by an underlined name.
- Affordances. Things the user can act on, like buttons and fields. Represented by a name written under a Place.
- Connection lines. An arrow that shows how an Affordance takes the user to another Place.
A breadboard for resetting a password might look like this.
You can read more about how these items work together in Shape Up by Ryan Singer. Ryan’s guide has a great example of how breadboarding leads to insights, new iterations, and different approaches.
It looks simple, and that’s the point. A good prototype has just enough to validate the biggest risks. Breadboards are easy to create and easy to read. They’re just enough to talk through how something could work and why.
A Breadboard Prototype Has The Right Level of Detail
The solution definition phase is full of uncertainty and risk. Even if your problem is well defined, there are still large gaps in knowing how well a specific solution will work and how much functionality is appropriate.
A breadboard has the right level of detail to:
Get the right people involved. I’ve created breadboards during live workshop sessions with clients to work out tricky business rules for a user to securely access financial information. I’ve created them in groups of developers, engineers, and project managers to work through and agree on functionality.
Define the scope of the solution. A breadboard is a simple way to document how much a specific feature should do, and where in the application it starts and ends. You can show a breadboard to a client and ask, “If the release did this, would that address the problem?”. You can even create breadboards to show what would not be included in a release.
Try ideas quickly. Breadboards are incredibly lightweight. They’re as malleable as words on a whiteboard. You can quickly change a screen, or a flow. Or create several alternative flows.
Validate risks. A breadboard gives an overview of the roles, actions, data, and steps to accomplish a task. Use these to identify risks and assumptions about how your application is feasible, desirable, and viable. Feasible: can we build, manage, and scale this solution? Desirable: does this meet the user’s needs? Viable: is there a market and business fit?
Tips When Prototyping With Breadboards
Here are some things that help my team in breadboarding sessions.
Define the problem. Before you decide what to make, agree on why it should be made. This can be as simple as a one sentence problem statement, or as involved as a collection of personas, user journeys, and value propositions.
Start with the beginning and the end. The breadboard represents a story. Start by adding two places: the place where the user begins and the place where the user has completed the task and solved their problem. Then go back to the starting place and add more places in narrative order, as if you were telling a story of the user progressing through their task.
Stay at a high level of detail. Our breadboards were most useful in providing a birds-eye-view of a feature. Identify the big interactions and connections and keep it at that. You don’t need an affordance for every item that will be on the screen. And you don’t need a connection line for each possible action. Keep it readable. It’s not about capturing every detail, it’s about creating a compelling story of how your solution addresses the problem.
Make It Your Own
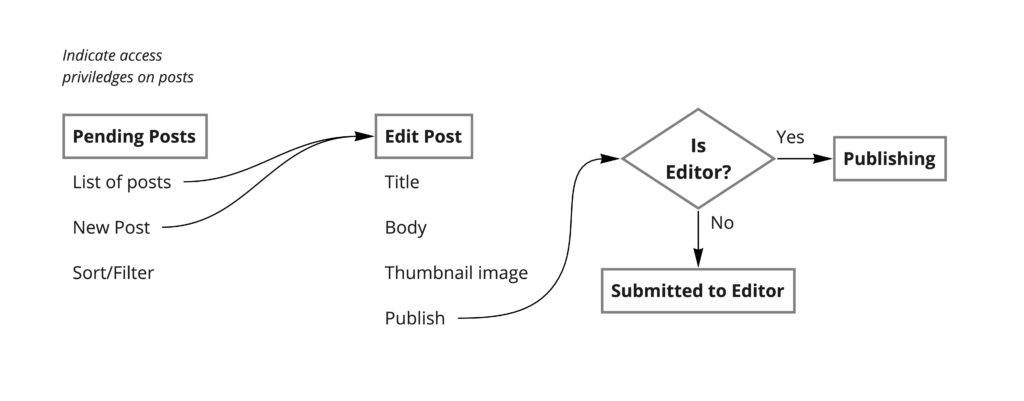
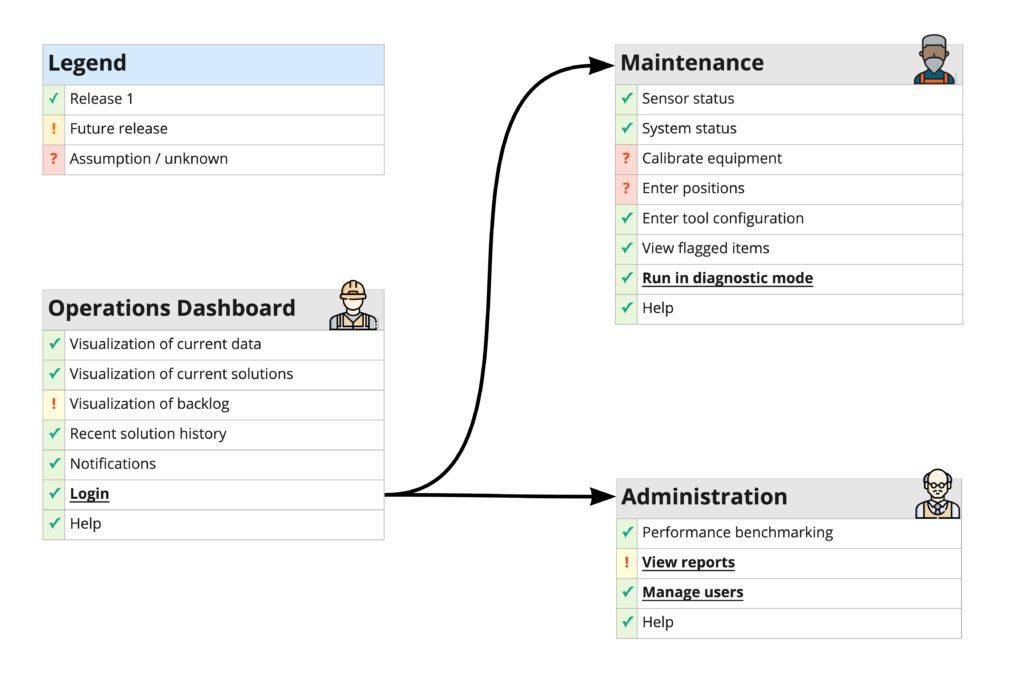
Breadboard prototypes are so simple that our teams naturally adjust the method as needed. Keep the tweaks simple to maintain breadboarding’s informal appeal. I’ve used the variations below in sessions with clients, hosted on Miro.
Give It a Try
There’s a squishy middle between problem definition and implementation. You need to work across disciplines, diverge and converge possibilities, learn quickly, and continue momentum. A breadboard prototype can help cross that gap. The method includes UX concerns like screen flow, scenarios, and information architecture while staying approachable. Breadboards advance design for the entire team.