I might be the Marketing Graphic Designer at SEP, but I do MUCH more than just design. Part of my role at SEP is to help visually show our brand. One of the ways we do that is through photography! While most companies stick with stock photos, we love to show you the faces of the people who work here and the office itself. Thus, I am also the resident photographer. I recently gave a talk about photography basics, and this blog came as a result. Enjoy!

In its most basic form, photography is the act of capturing light in a camera. There are three main ways to get light into the camera:
- Aperture
- Shutter Speed
- ISO
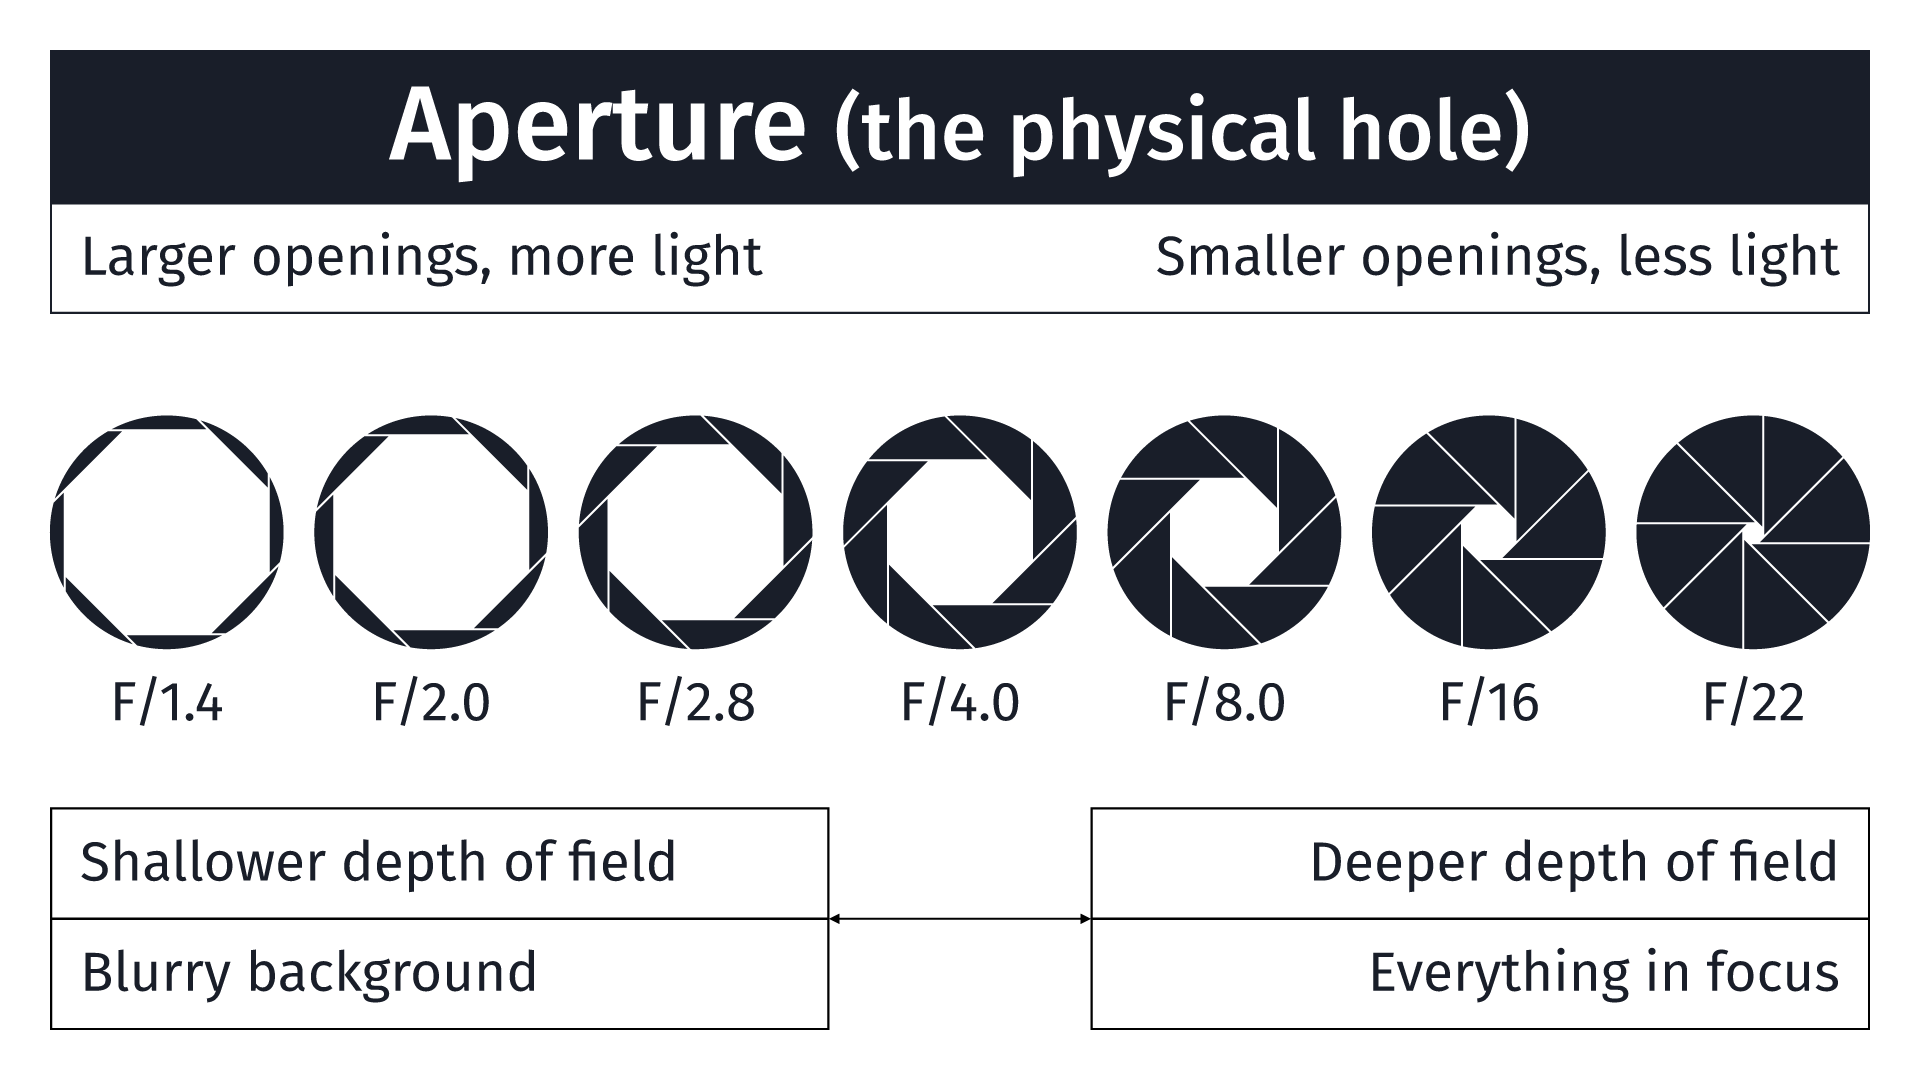
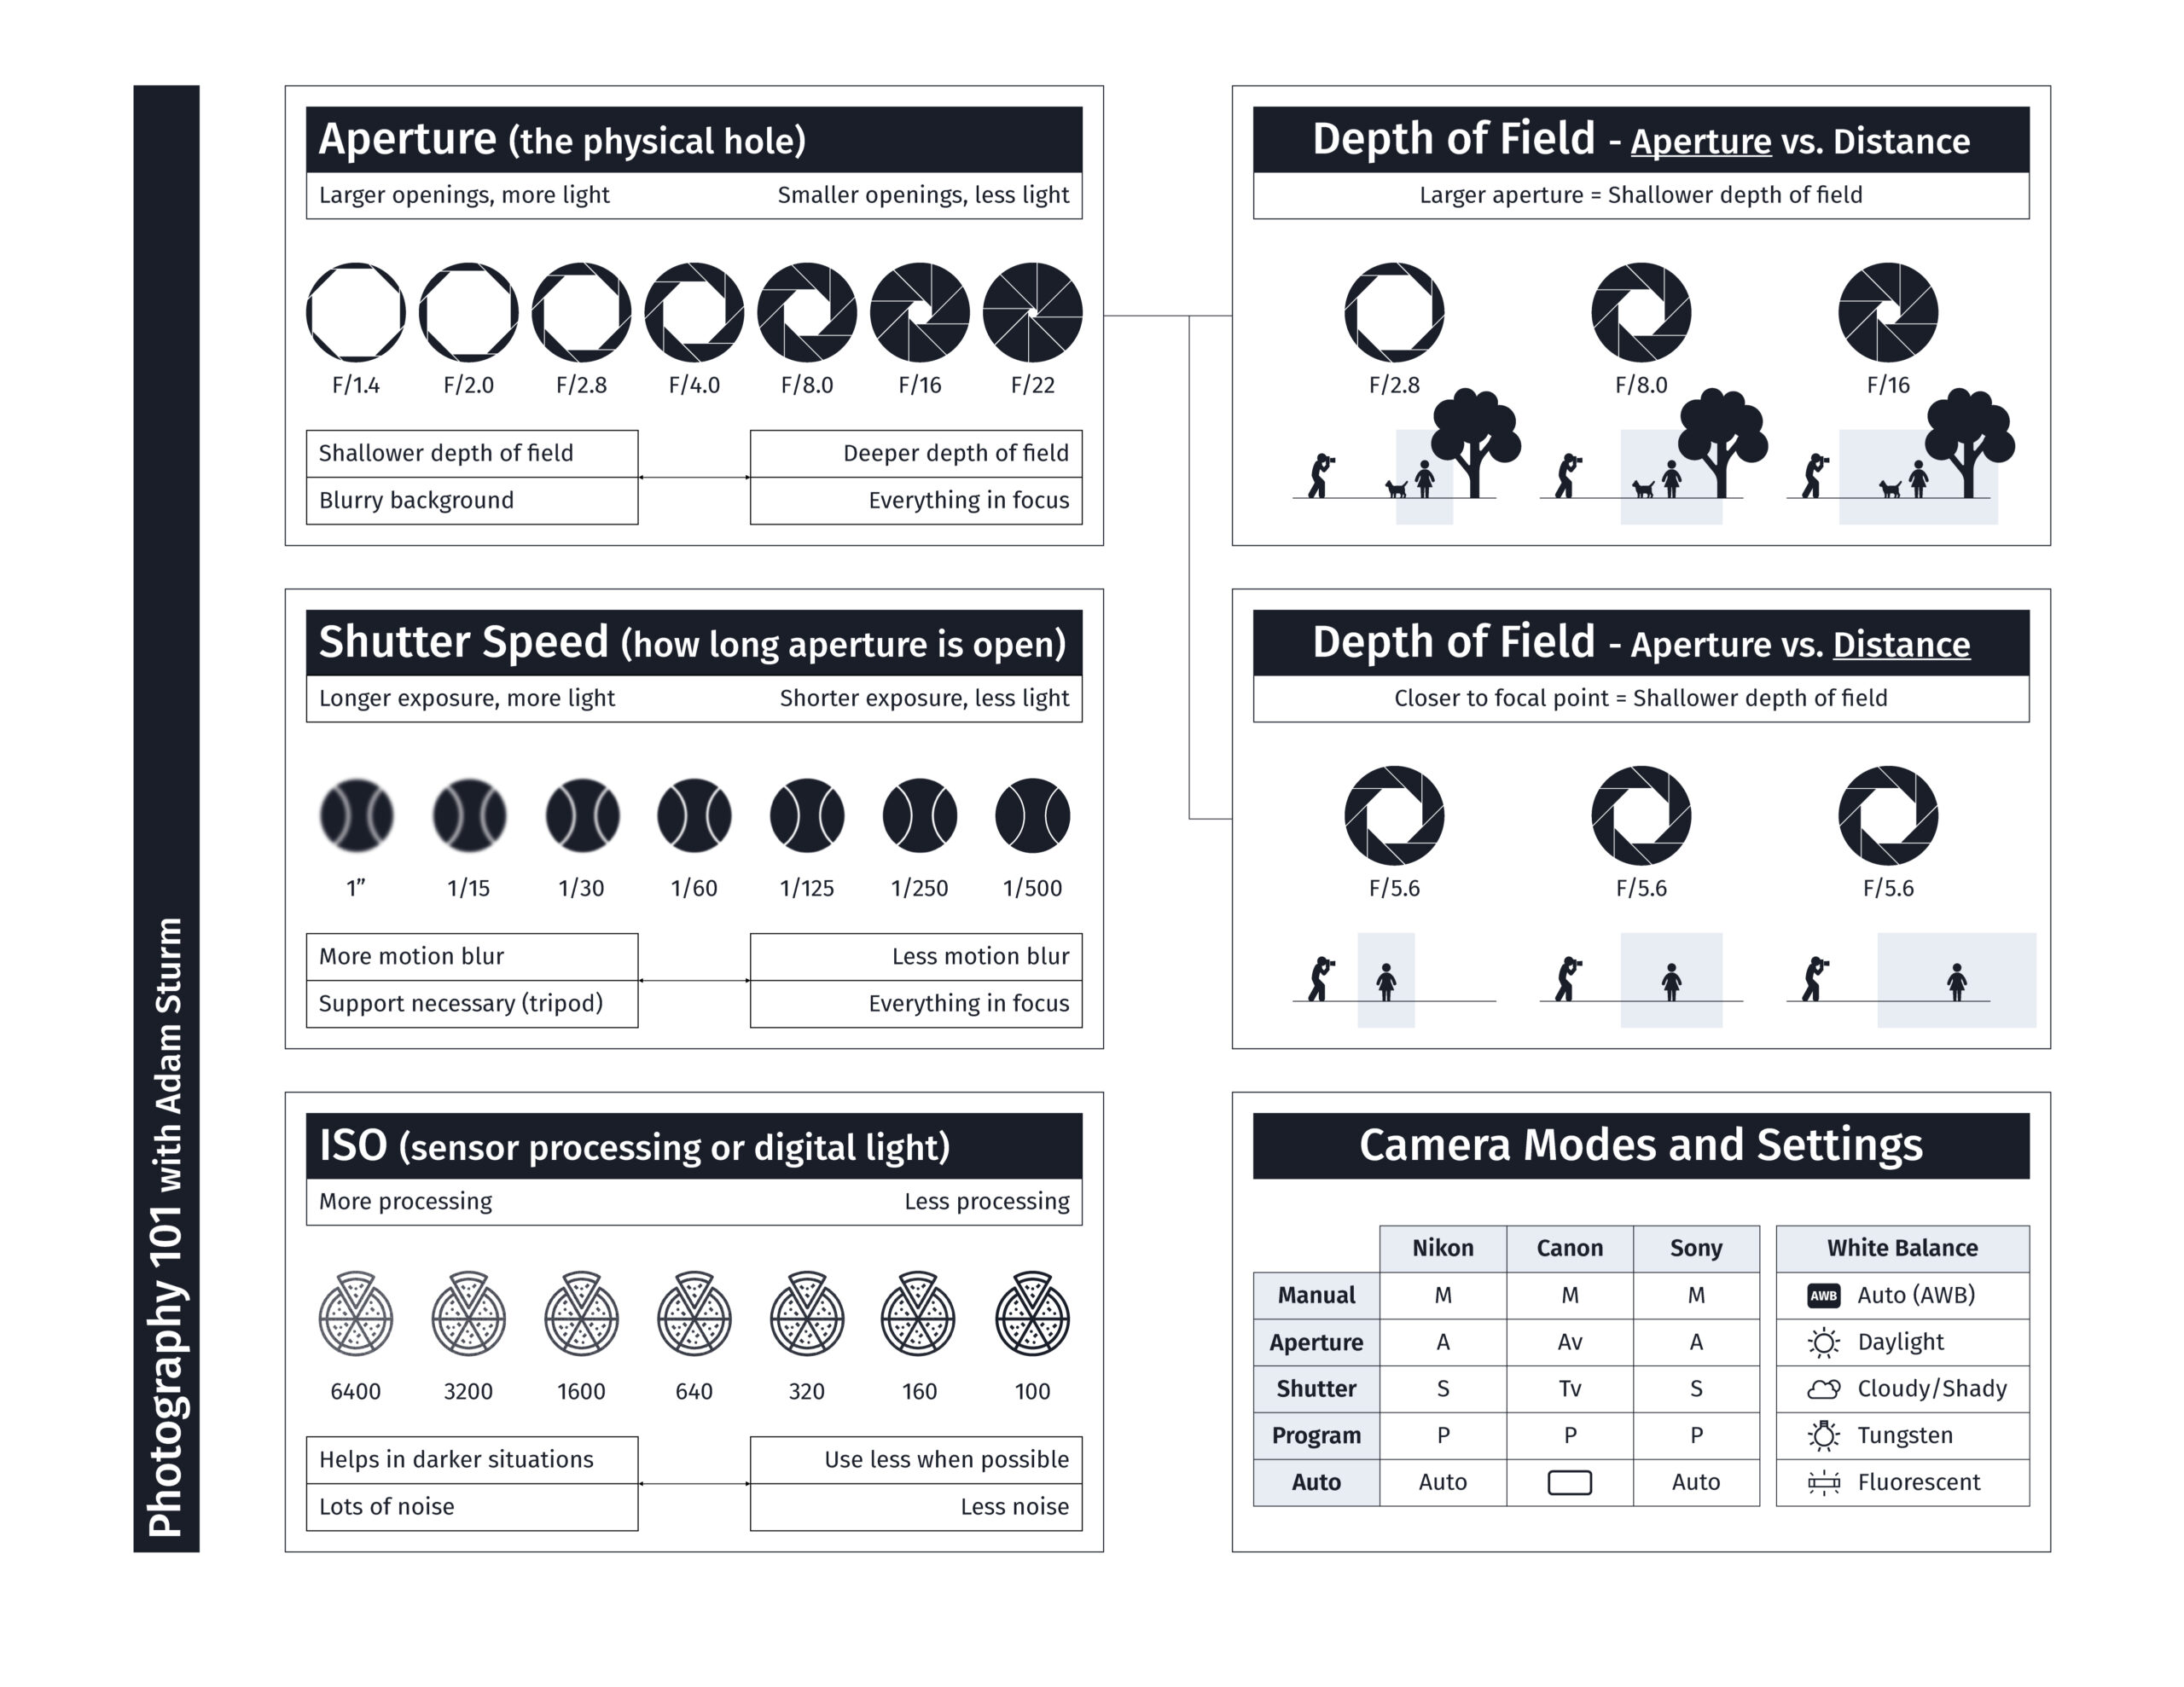
The first way of letting light into the camera is the aperture, or the physical hole. The larger the hole is, the more light enters the camera. Counterintuitively, a lower number F-Stop means a bigger hole, or more light. The aperture is arguably the most important of the three because it allows you to control your depth of field!
A larger aperture (smaller F-Stop) gives a shallower/smaller depth of field. The focal length is smaller, which leads to things closer to you or farther away being out of focus. Professional lenses can often get very expensive because they allow for larger apertures.
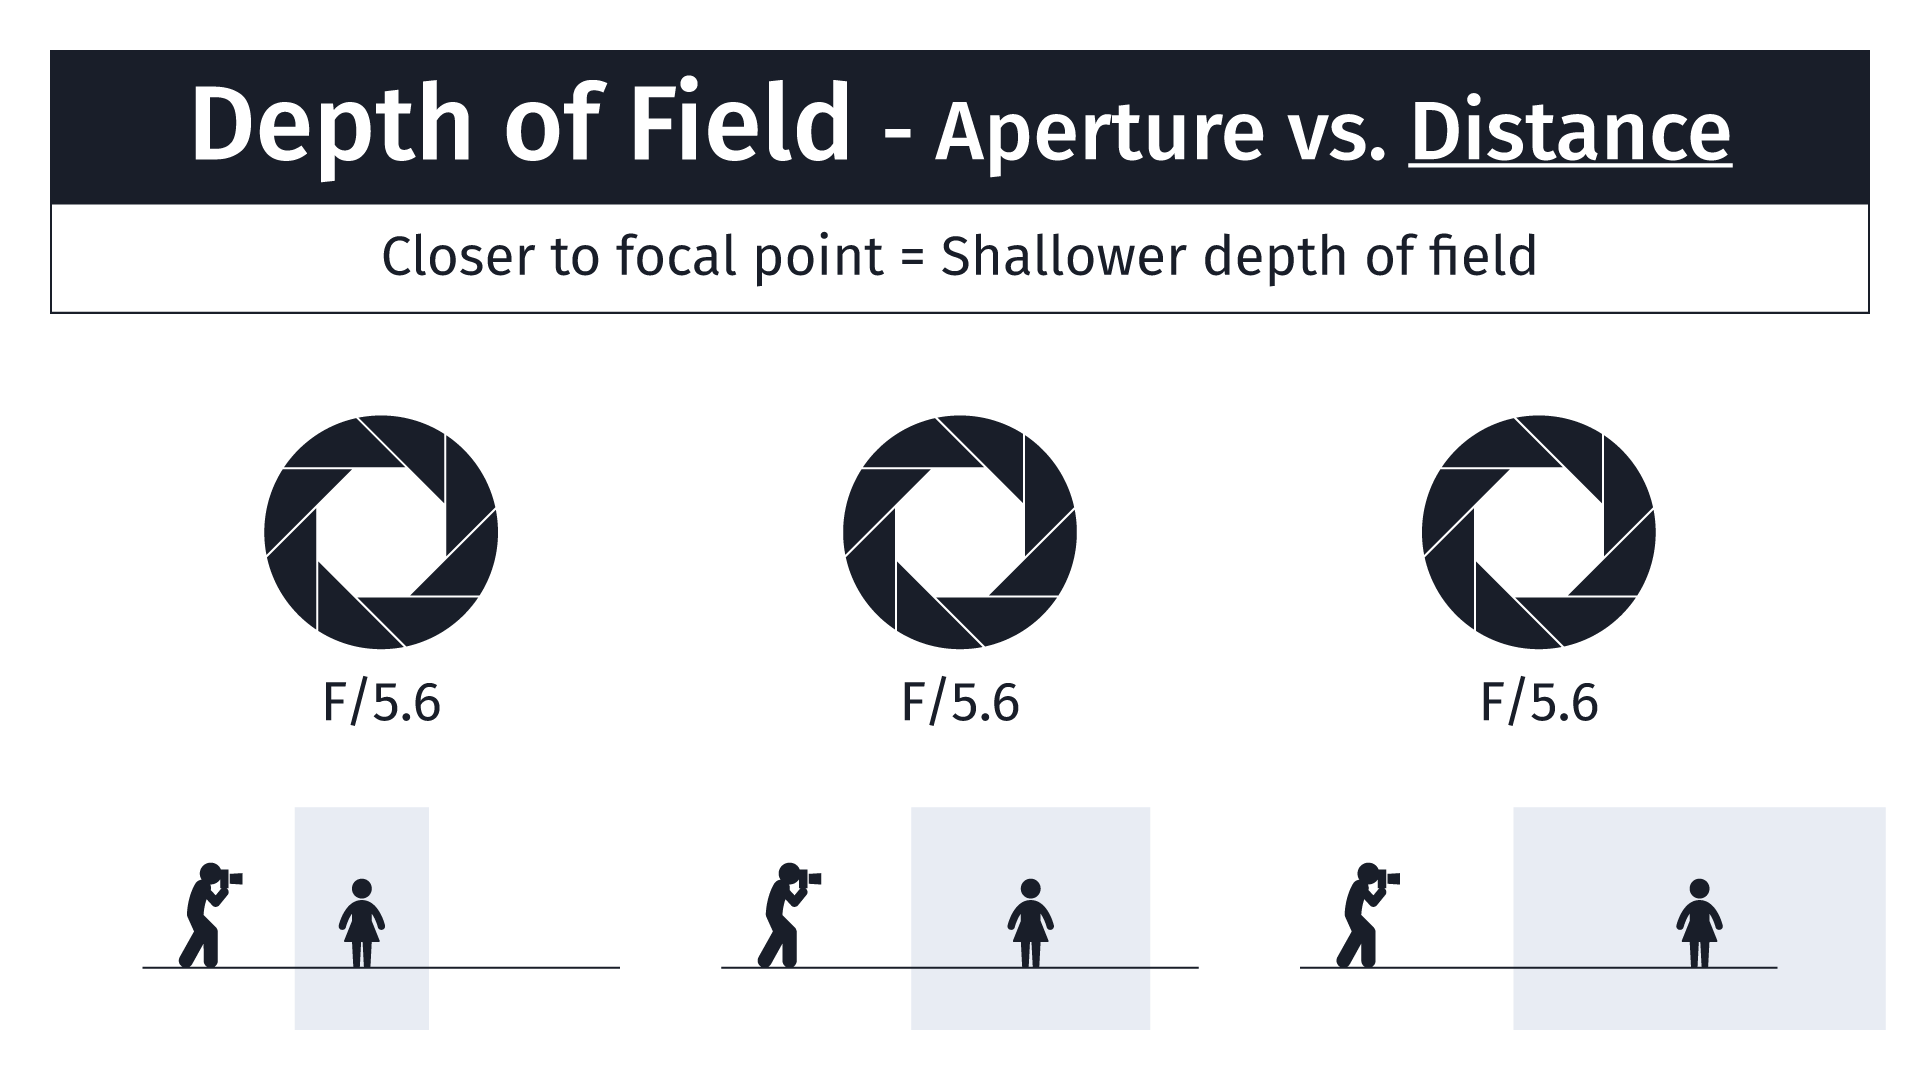
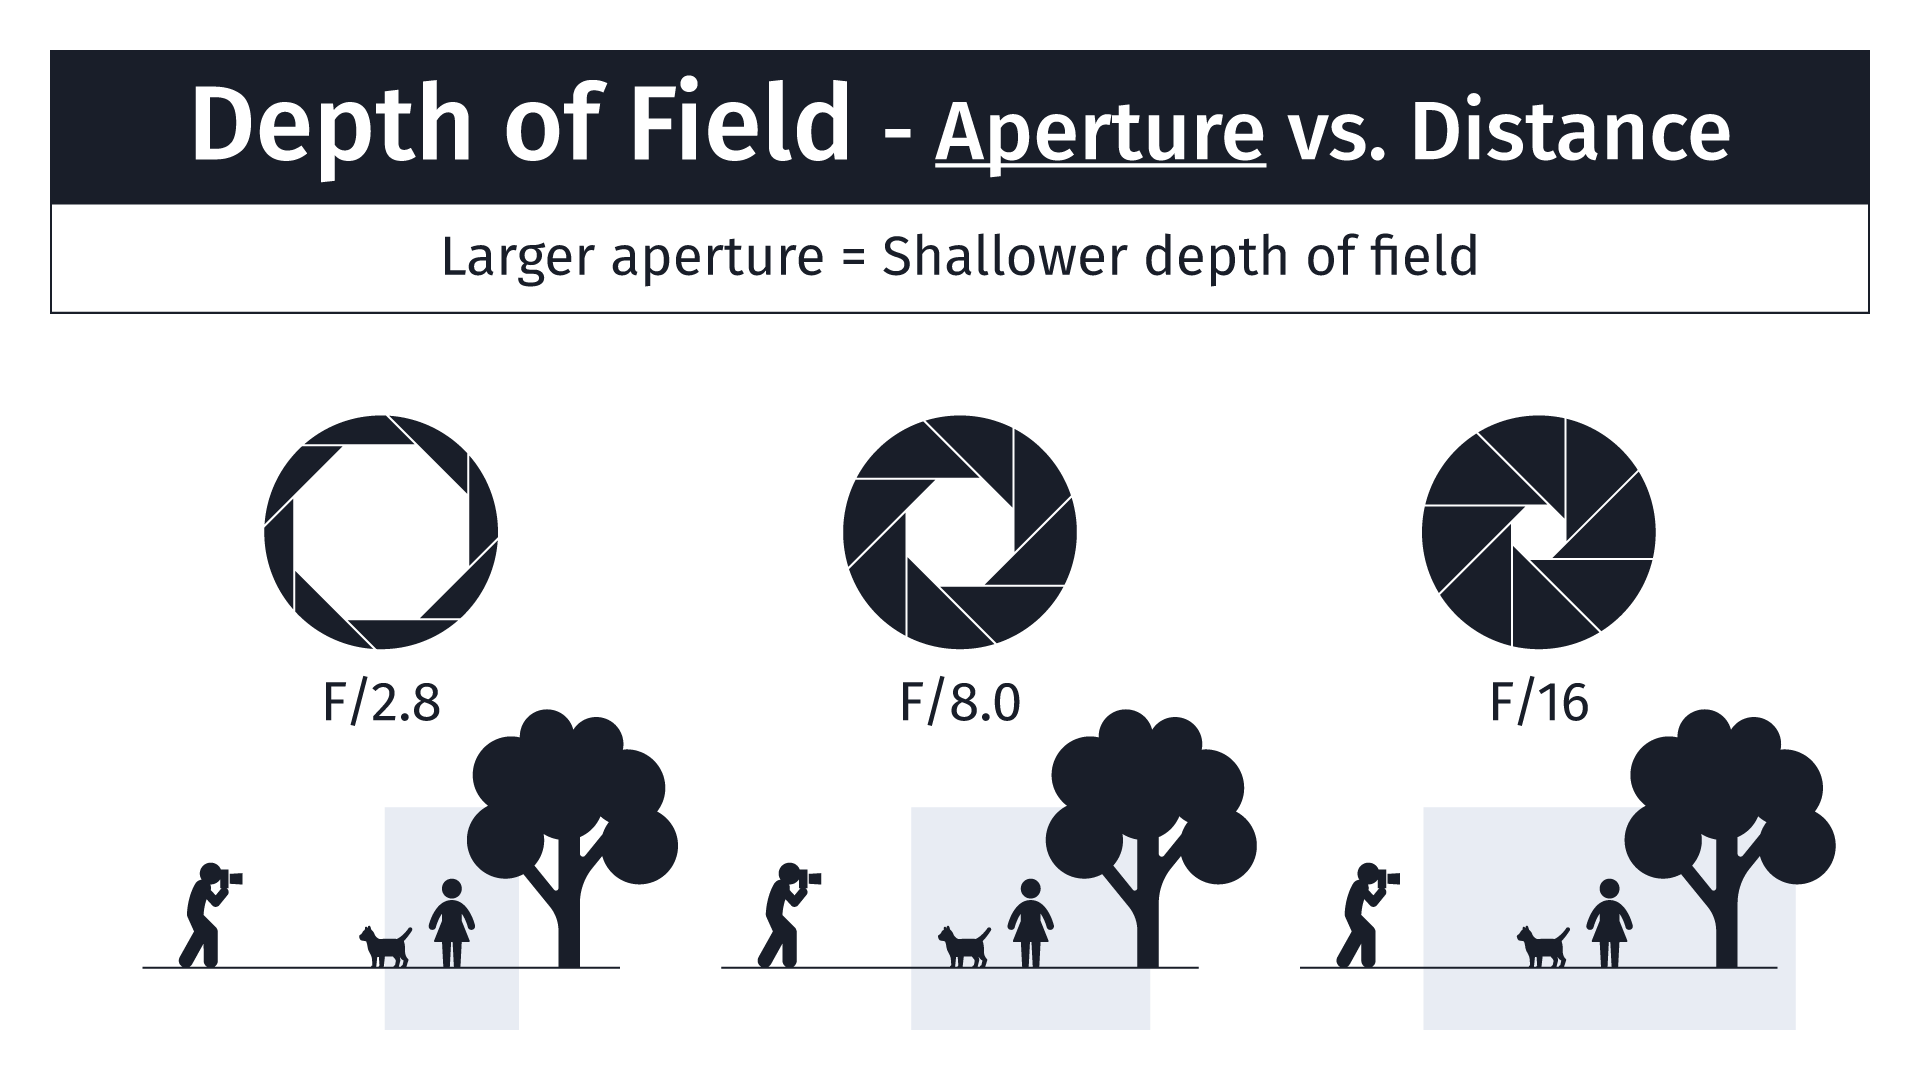
Depth of field can also be controlled by the distance between the camera and the subject. The closer you are, the less depth of field there will be. Likewise, if you’re very far away from your subject, it’s more difficult to get a shallow depth of field simply due to distance. More will be in focus because you’re far away.
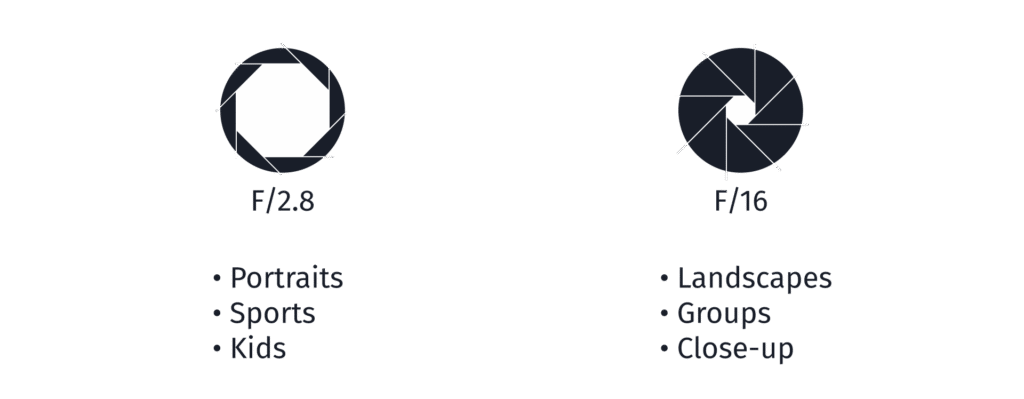
Larger apertures are great for portraits of people, for sporting events, and for capturing moments with children. The foreground and background will be blurry, putting the subject of your composition in focus. Smaller apertures are great for things like landscape photography and group pictures because you want everything to be in focus.
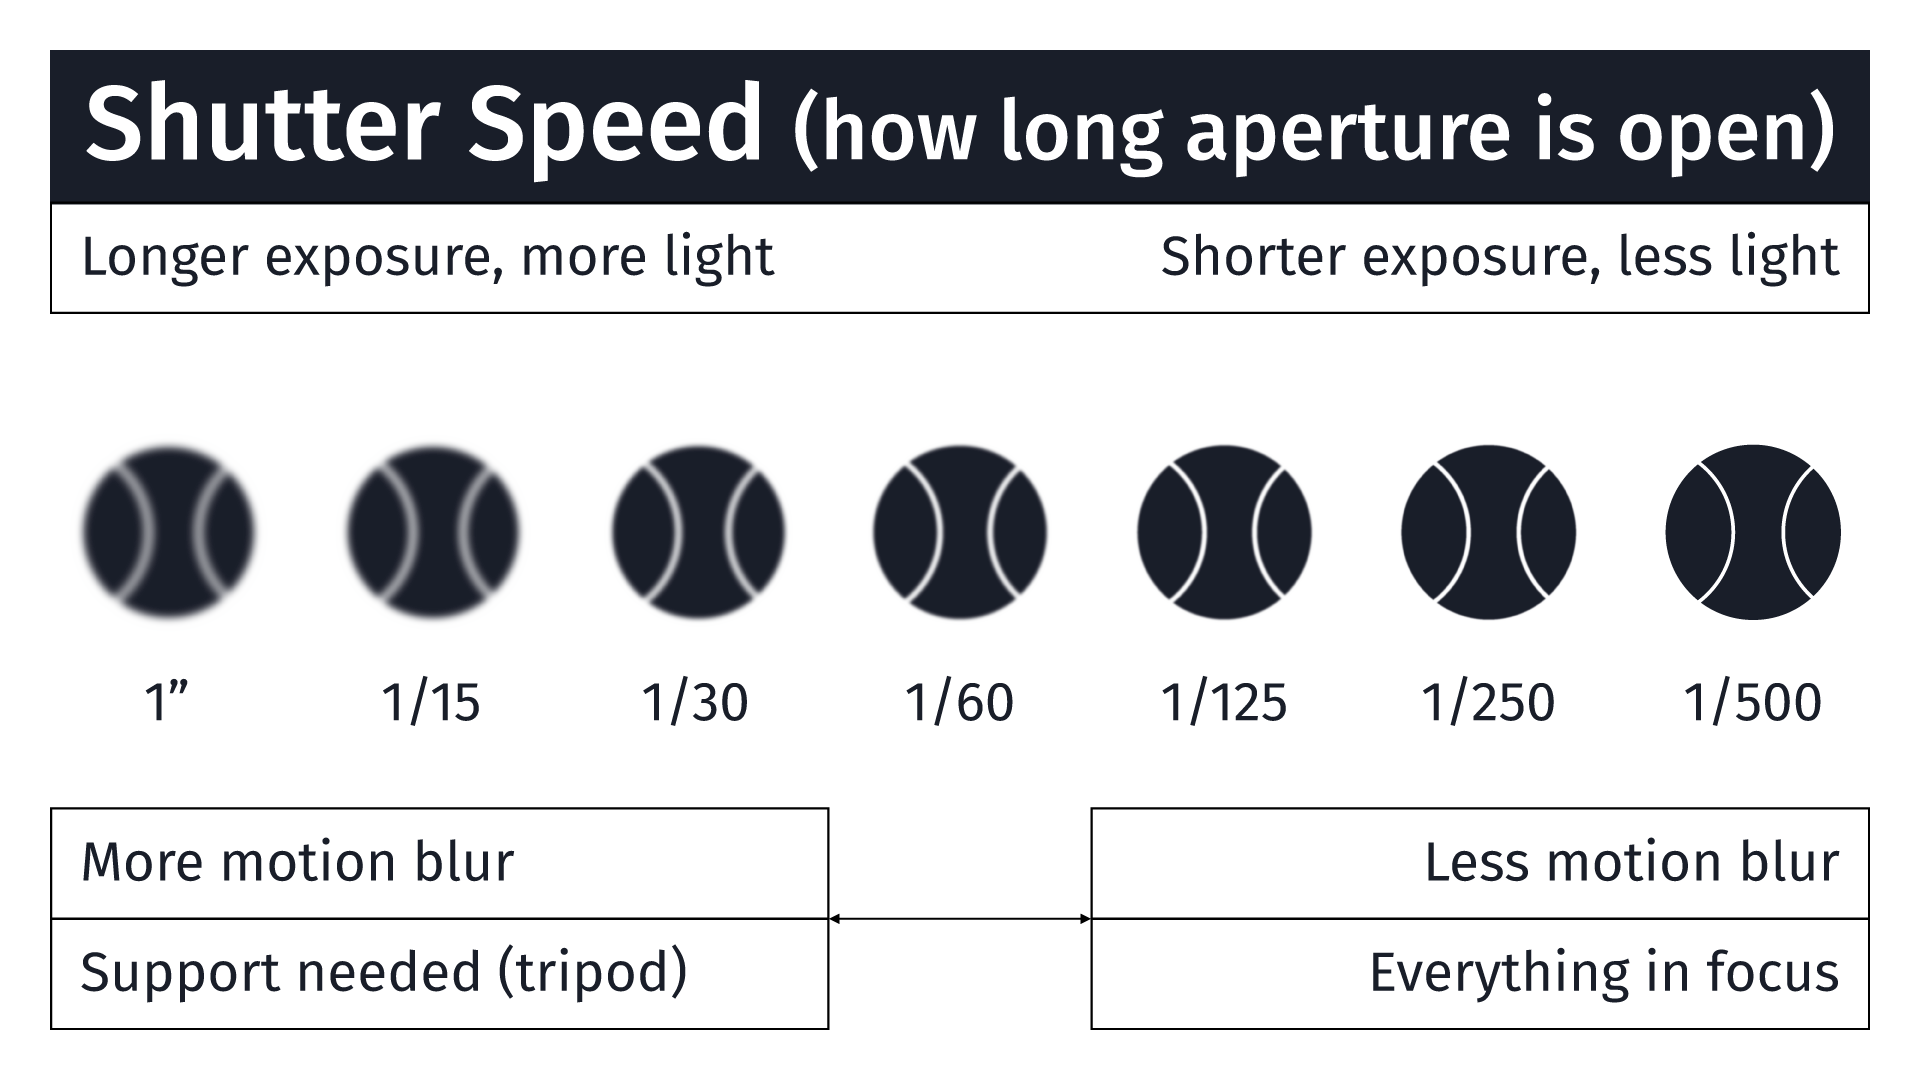
The second way of letting light into the camera is shutter speed. The shutter is the physical shutter opening and closing that makes the clicky noise! The longer it’s open, the more light enters the camera. Longer shutter speed lets in more light, but things that are moving might be blurry.
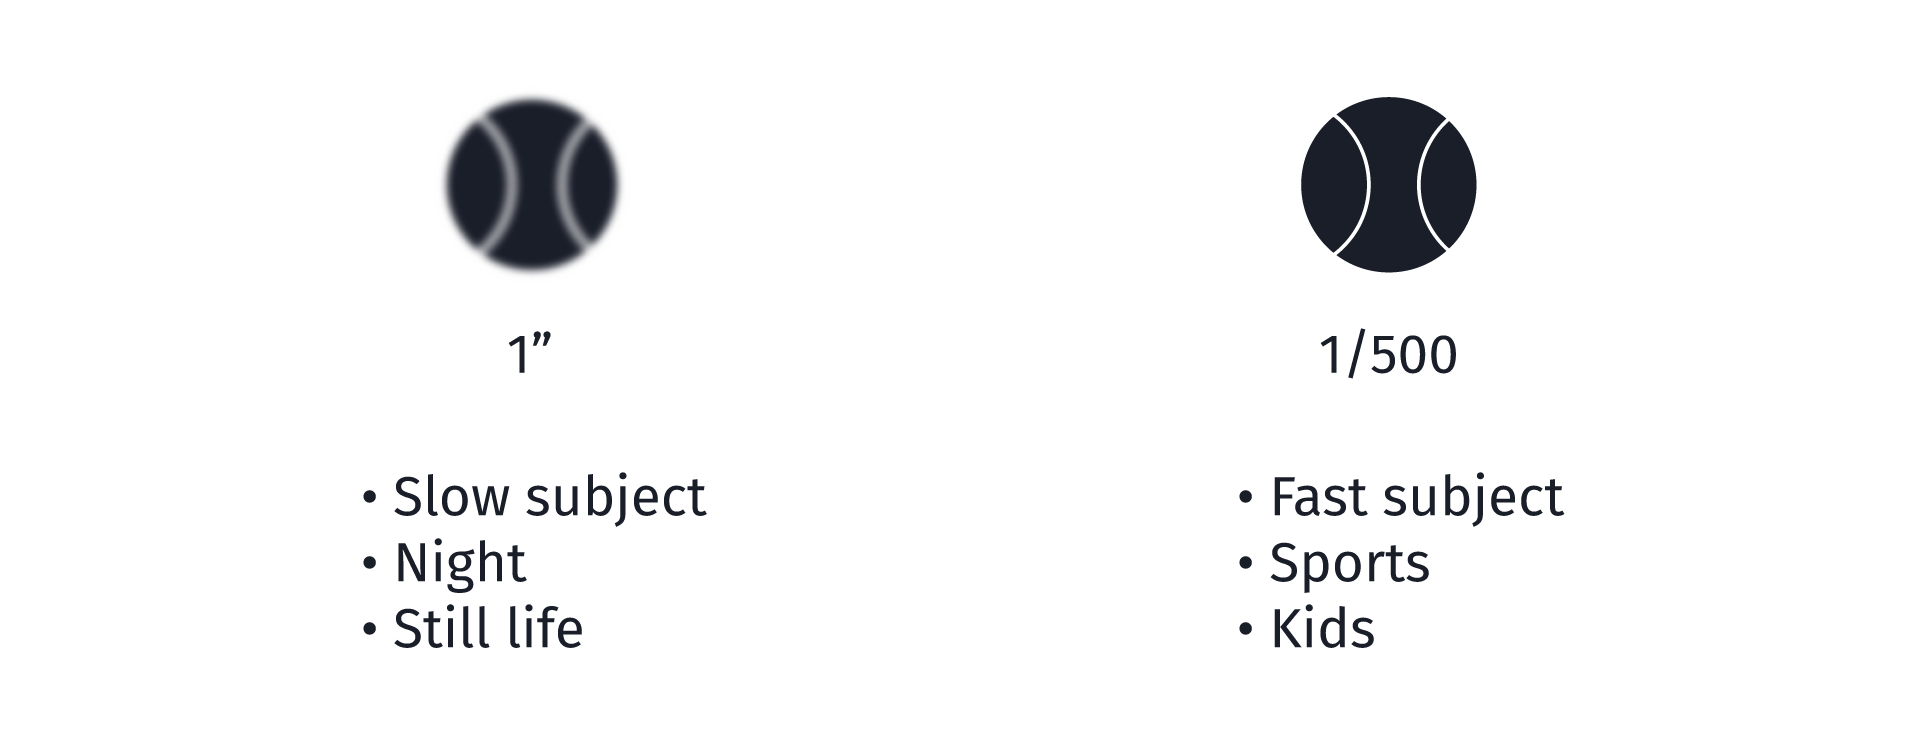
Slow shutter speeds are useful when there is less light, like at night or in a dark room. It’s also useful when using a tripod and the subject matter isn’t moving, such as still life photography. In general, faster shutter speeds are preferred when capturing dynamic, fast-moving subjects like sports or children at play.
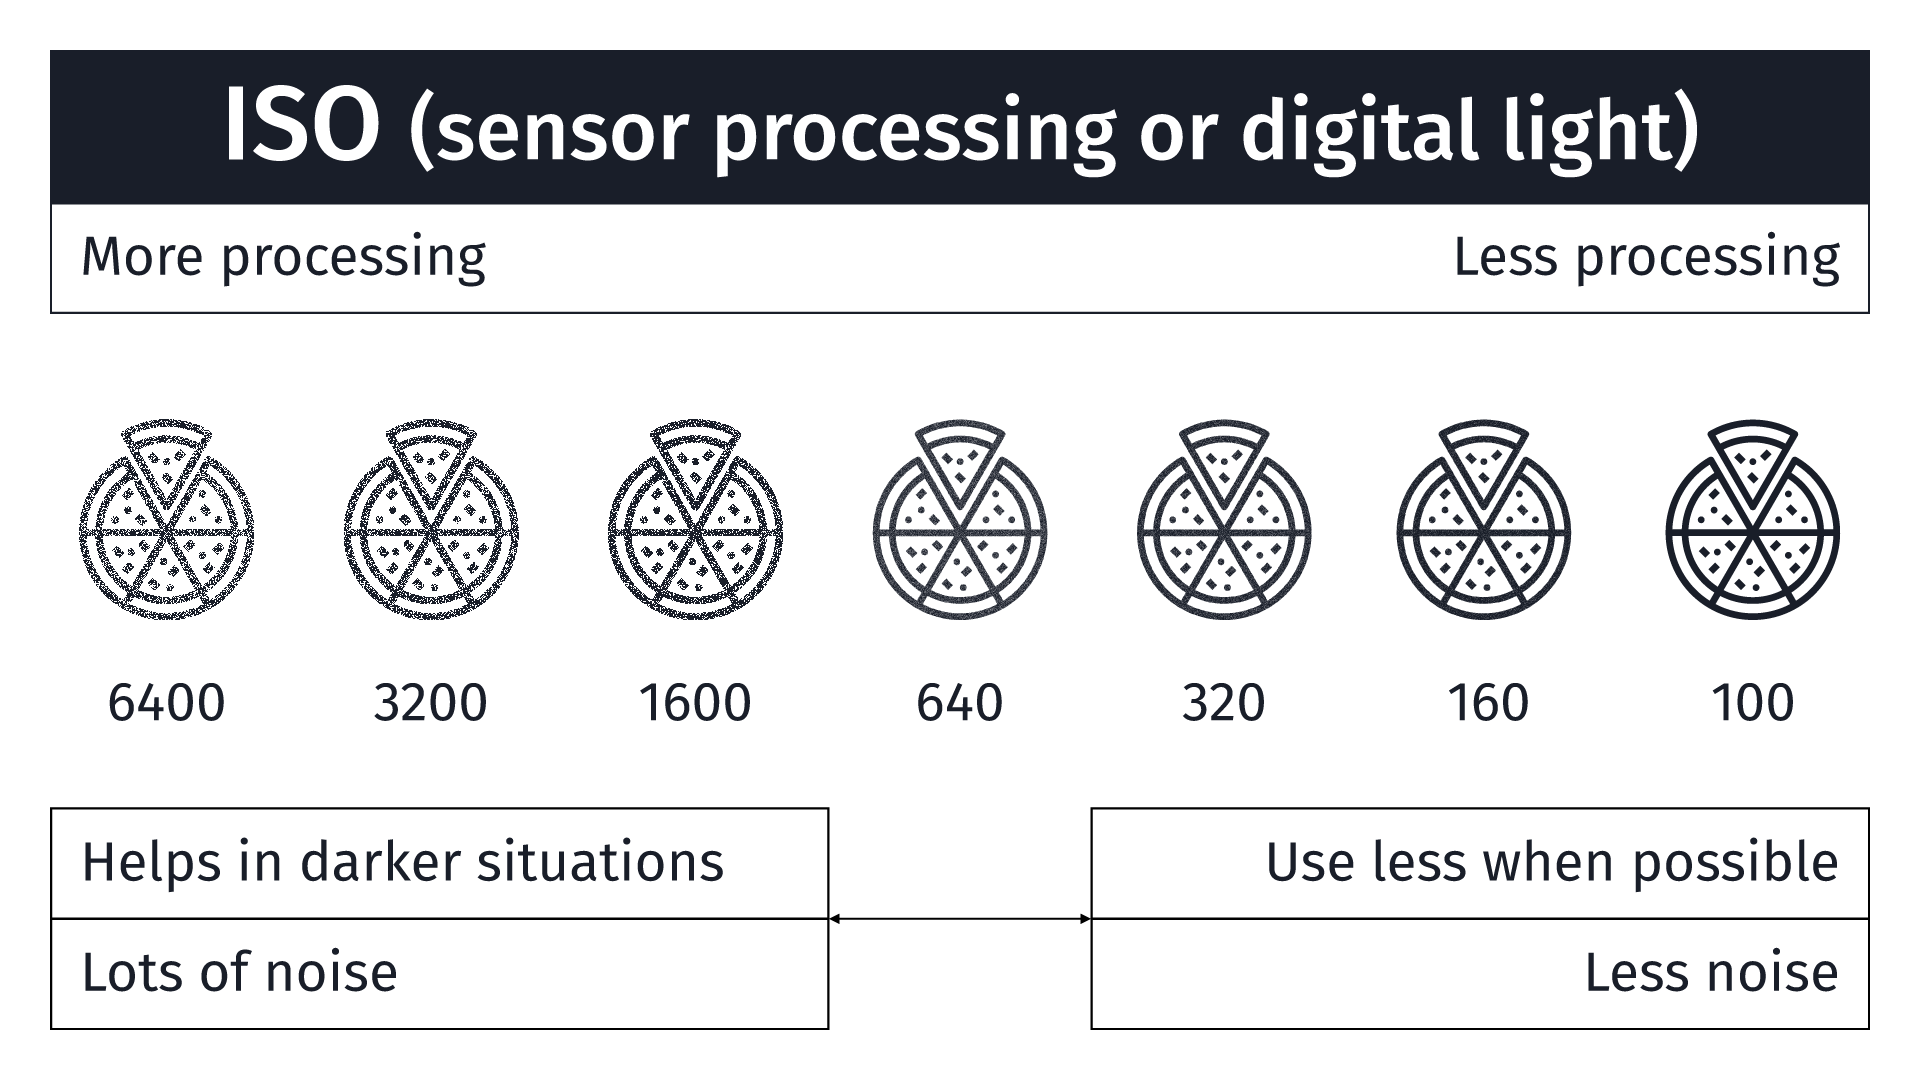
The third and final way of controlling light into the camera is ISO. ISO is sensor processing, or digital light. The sensor can digitally enhance the light coming into the camera, but the more processing, the more noise or pixelation you get in the result. Higher-end cameras have much better sensors and can process more light in darker conditions.
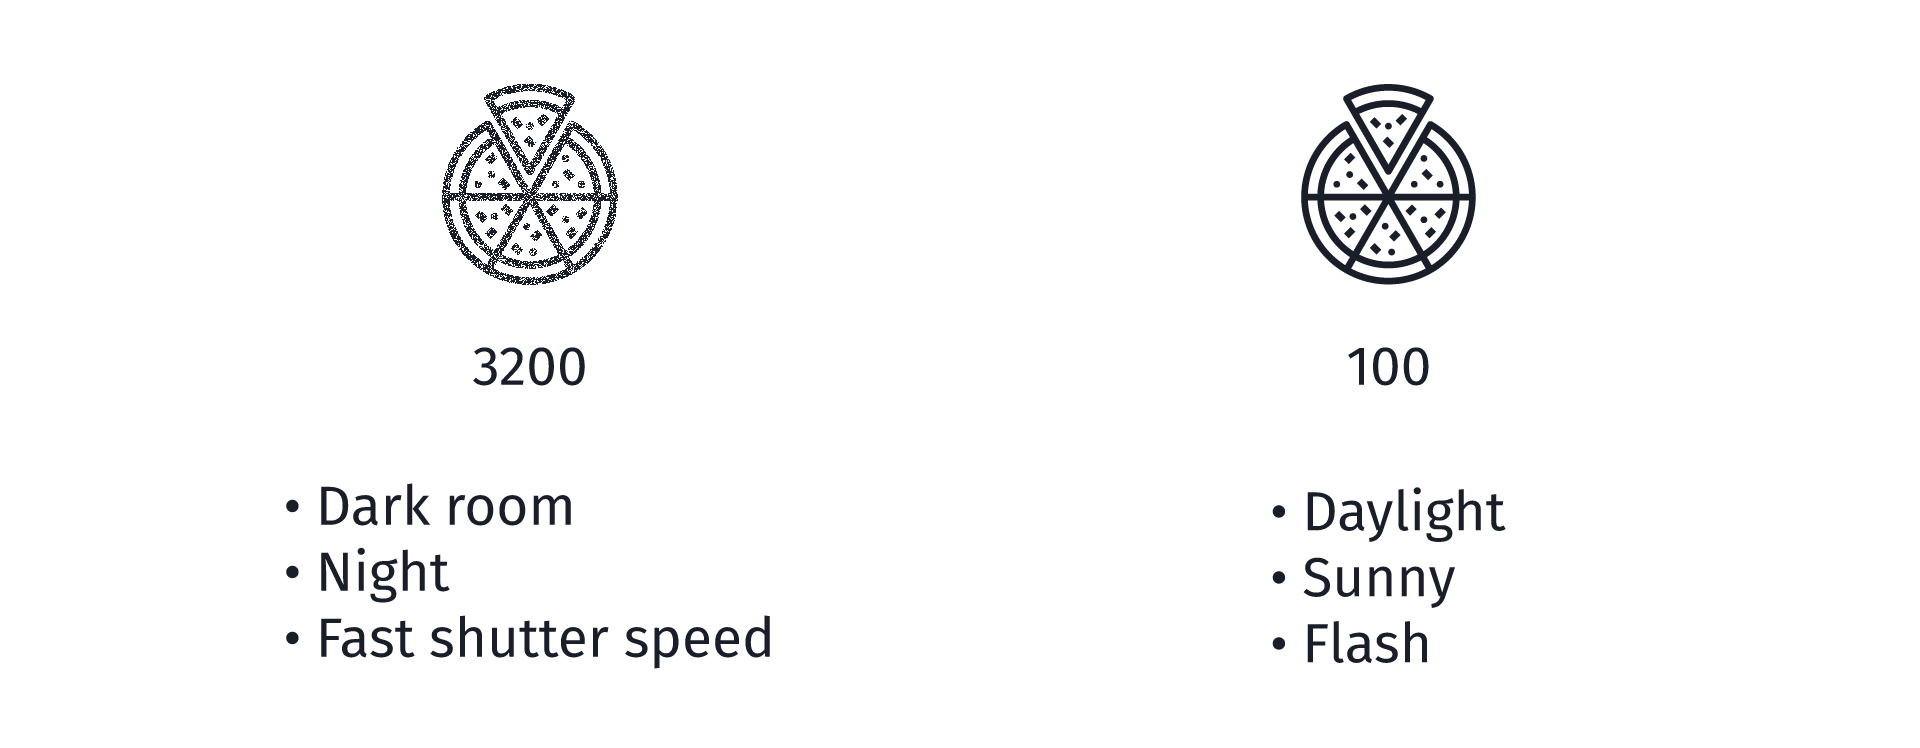
It’s best to use as little ISO as possible. This is easy to do on sunny days or in environments where there is a lot of light. You can also add light through the use of a flash. In some situations, ISO is necessary, like at night or in a dark room. Just remember, the more ISO you use, the more noise there will be in your image.
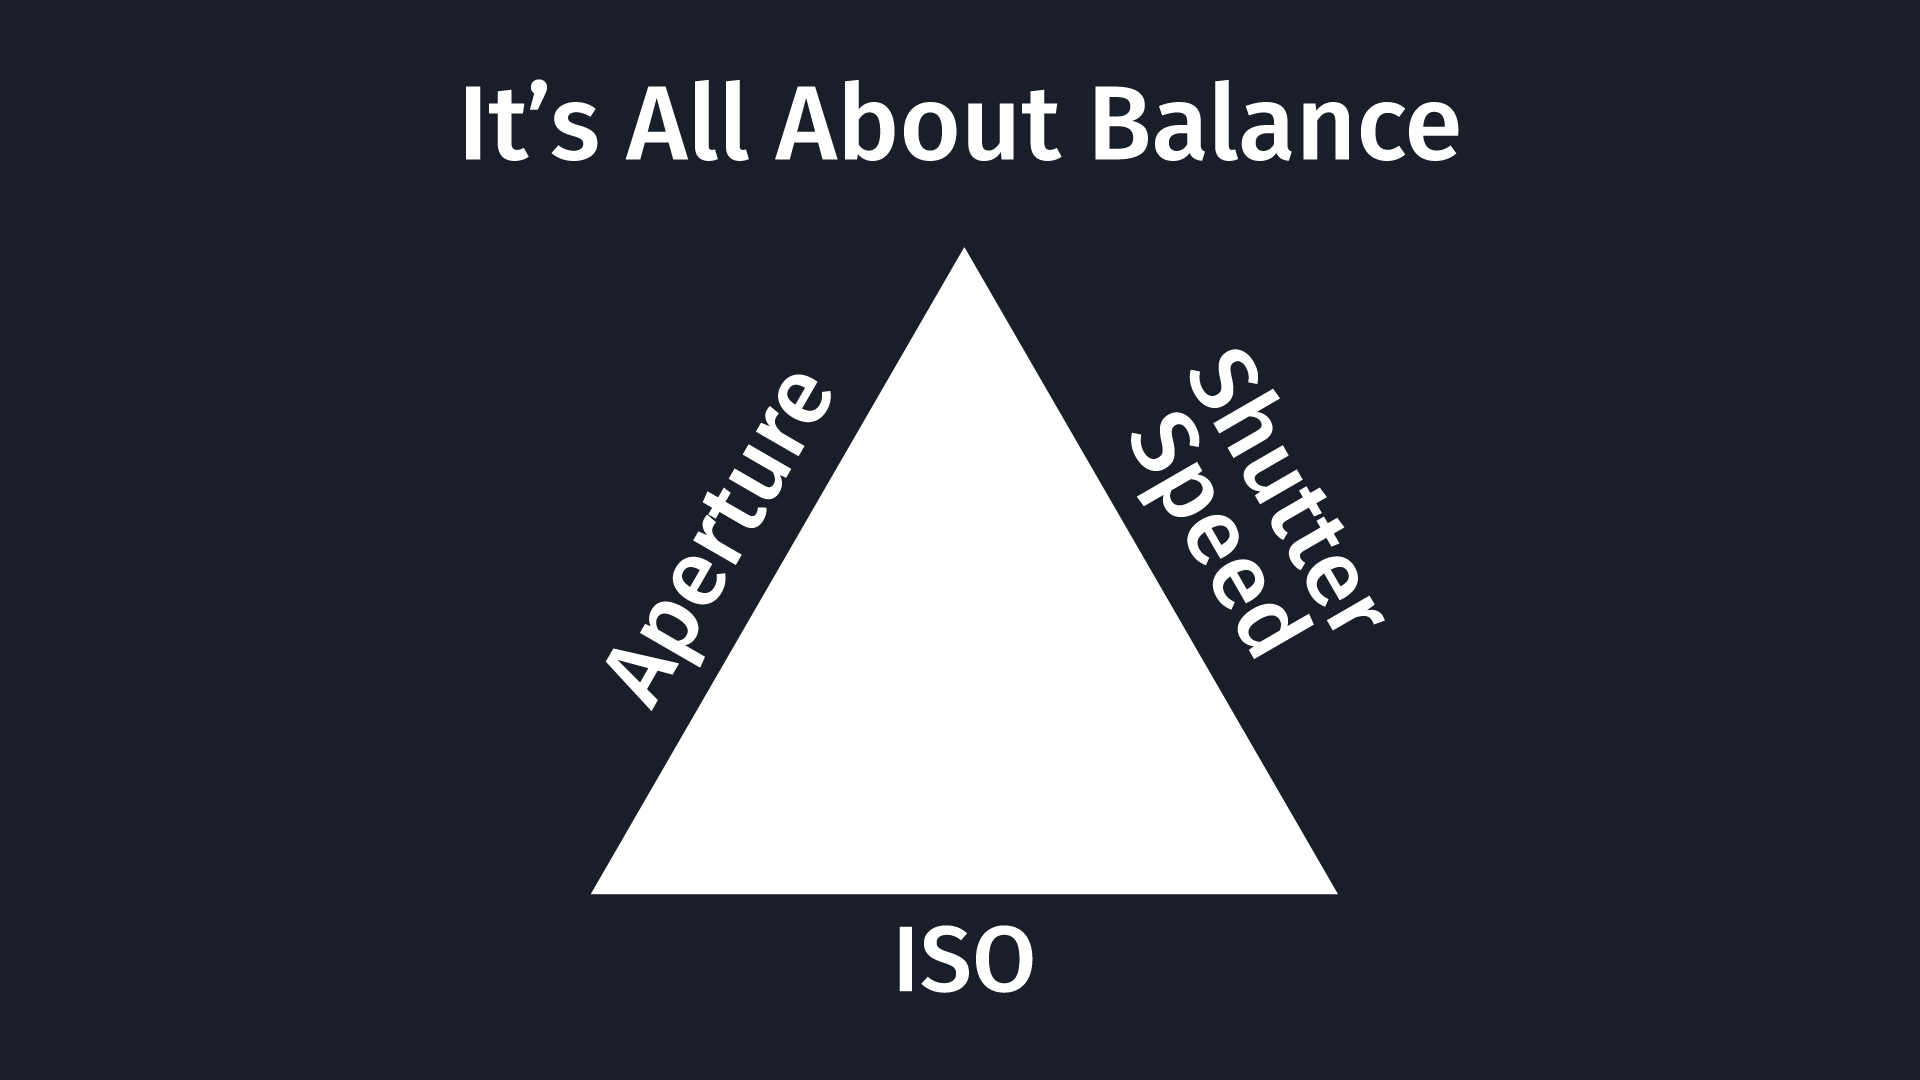
When it comes to proper exposure of an image, it’s all about balance. A larger aperture lets in more light, so you can have a faster shutter speed or lower ISO. If you need a fast shutter speed, you can compensate with a lower aperture or higher ISO. You can control these in the camera settings.
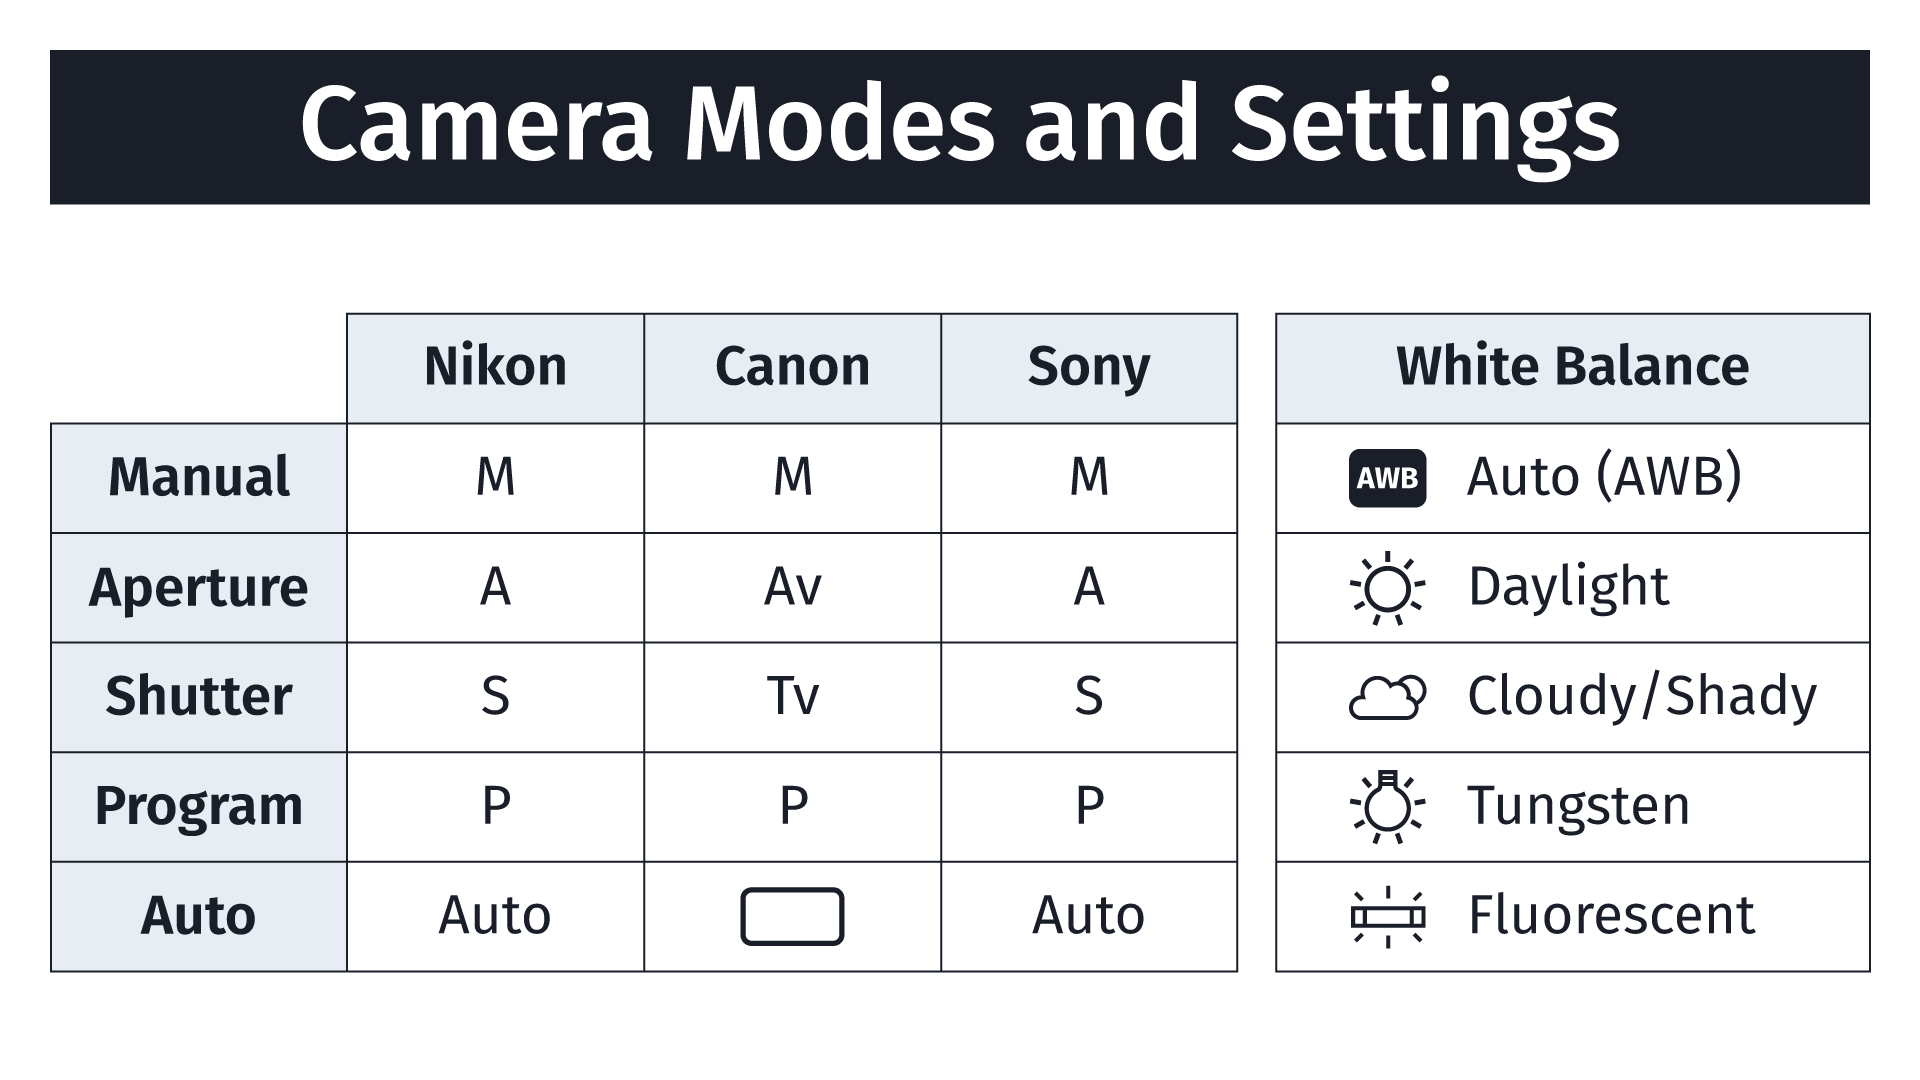
Different modes have different icons depending on the type of camera you’re using, but the essentials are the same.
Manual mode lets you control every aspect of the camera. Most of the time, you will probably want to focus on control over one aspect, like the aperture, so you can control depth of field. In that case, the Aperture mode would let you pick the aperture, then the camera would automatically adjust the shutter speed and/or the ISO for proper exposure. If you pick Shutter, you’re in control of the shutter speed, and the camera will automatically adjust the aperture/ISO so you keep your chosen shutter speed. Auto gives control over everything to the camera. I highly recommend AGAINST full Auto mode.
Another thing to note on your camera is what your White Balance is set at. Different kinds of light have different color temperatures. A cloudy day has more blue light in it than full sun, which is redder. Indoor fluorescent lights are much cooler than the warmer yellows of tungsten. Auto is a safe choice for White Balance, or you can adjust accordingly.

When looking through the viewfinder, most cameras also have a meter like this to help you expose the image properly. You can adjust and balance the aperture, shutter speed, and ISO to get the bar in the middle.
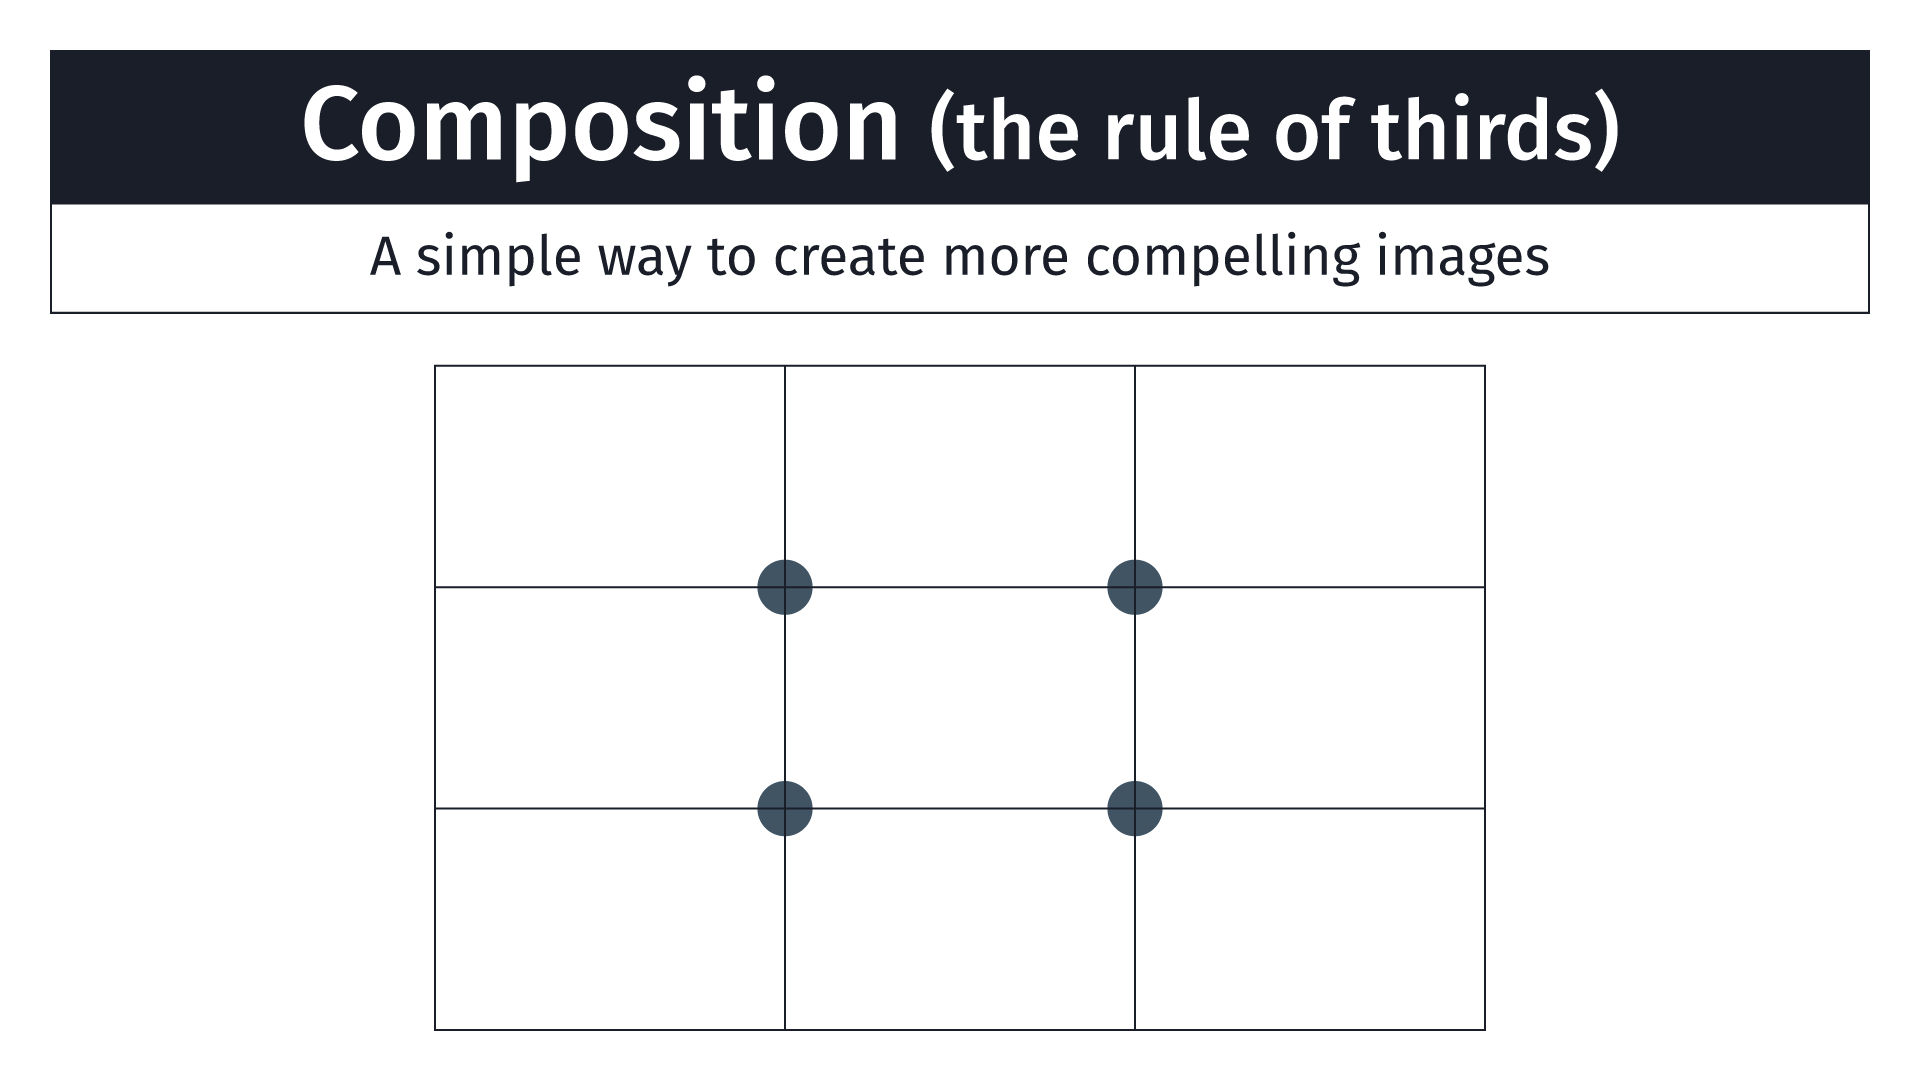
The last tip I have isn’t about the camera at all, but rather composition. Try not to put your subject right in the middle of the screen. Instead, follow the “rule of thirds” and keep your subject 1/3rd to the right, left, top, or bottom of your image. This isn’t a hard-and-fast rule, and exceptions can be made, but if you keep this in mind when framing your photograph, it will help you create more compelling images.
This is a lot to remember for a beginner, so I created a cheat sheet you can print off as a reference. Enjoy! And happy photographing!