

There are a few blog posts out there that already show you how to host a React web app in Azure, but since I encountered a few issues, I thought I’d document what worked for me. These are the very simple steps I followed to set up my web app in Azure, with continuous integration and deployment.
Step 1: Create the React Web App
The first step was to create the web app. I already had Node.js and npm installed, but if you do not, first go ahead and install them (note that npm comes with Node.js). Then scaffold the react app using the create-react-app quick-start. For example:
npx create-react-app jrr-demo-reactInitially, I decided to follow this blog post to allow Azure to build the project as a Node.js app, which requires some configuration using a web.config, and app service settings such as the Node.js version. However, for some reason this setup did not work, so I abandoned it and decided to use a CI/CD (Continuous Integration / Continuous Deployment or Delivery) pipeline to build the project, and deploy the built code as a static site in Azure. So the next step was to create an app service in Azure to host the web app.
Step 2: Create an Azure App Service
I did this very easily via VS Code using the Azure App Service extension, but you can also do it in the Azure web portal. You will need an Azure subscription to be able to continue, but it is fairly easy to create a free subscription.
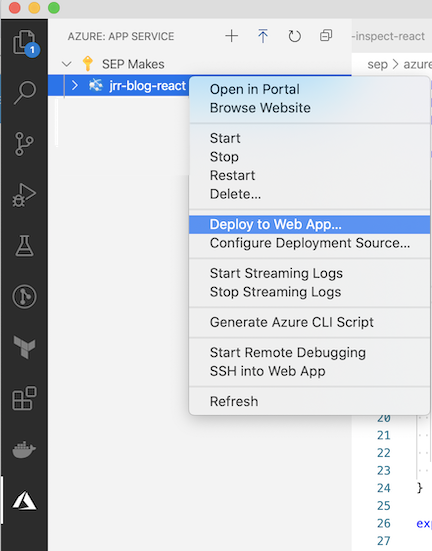
See below for a way to add the app service via VS Code, using the + button on the Azure App Service tab. I selected Windows as the OS for the app service. You may also need to create a new resource group.

Step 3: Deploy the Web App for Manual Testing (optional)
I did this to test out my code manually, but you can also just skip this step entirely and set up CI/CD to do the deploy.
First I built the react app:
cd jrr-demo-react
npm run build
Then I used the VS Code Azure App extension to deploy just the build folder to the App service (called jrr-blog-react) using the Deploy to Web App context menu item in the Azure App Service tab.
In the popup that opened,

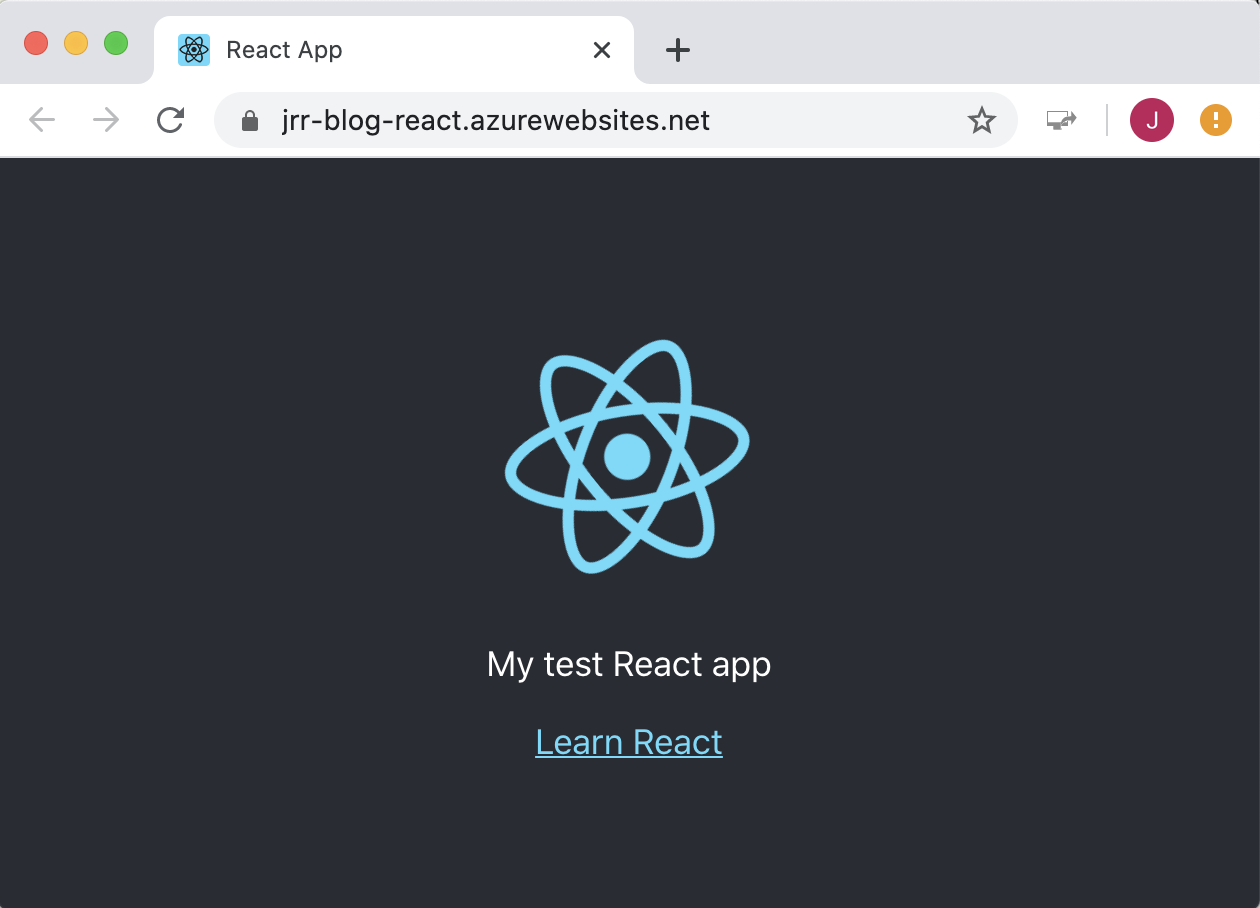
I browsed to the jrr-demo-react/build folder, and clicked Select. Waited for the code to deploy and then right clicked the app service and clicked Browse Website. That’s it, the browser opened the app hosted in Azure
Some gotchas to be aware of: Initially I deployed the entire folder jrr-demo-react to Azure, along with the build folder, but the app did not show up even though I added build/index.html as a default document. I had to add the following line to my package.json to make it work:
"homepage": "./build"Step 4: Set Up a Repo in Azure DevOps
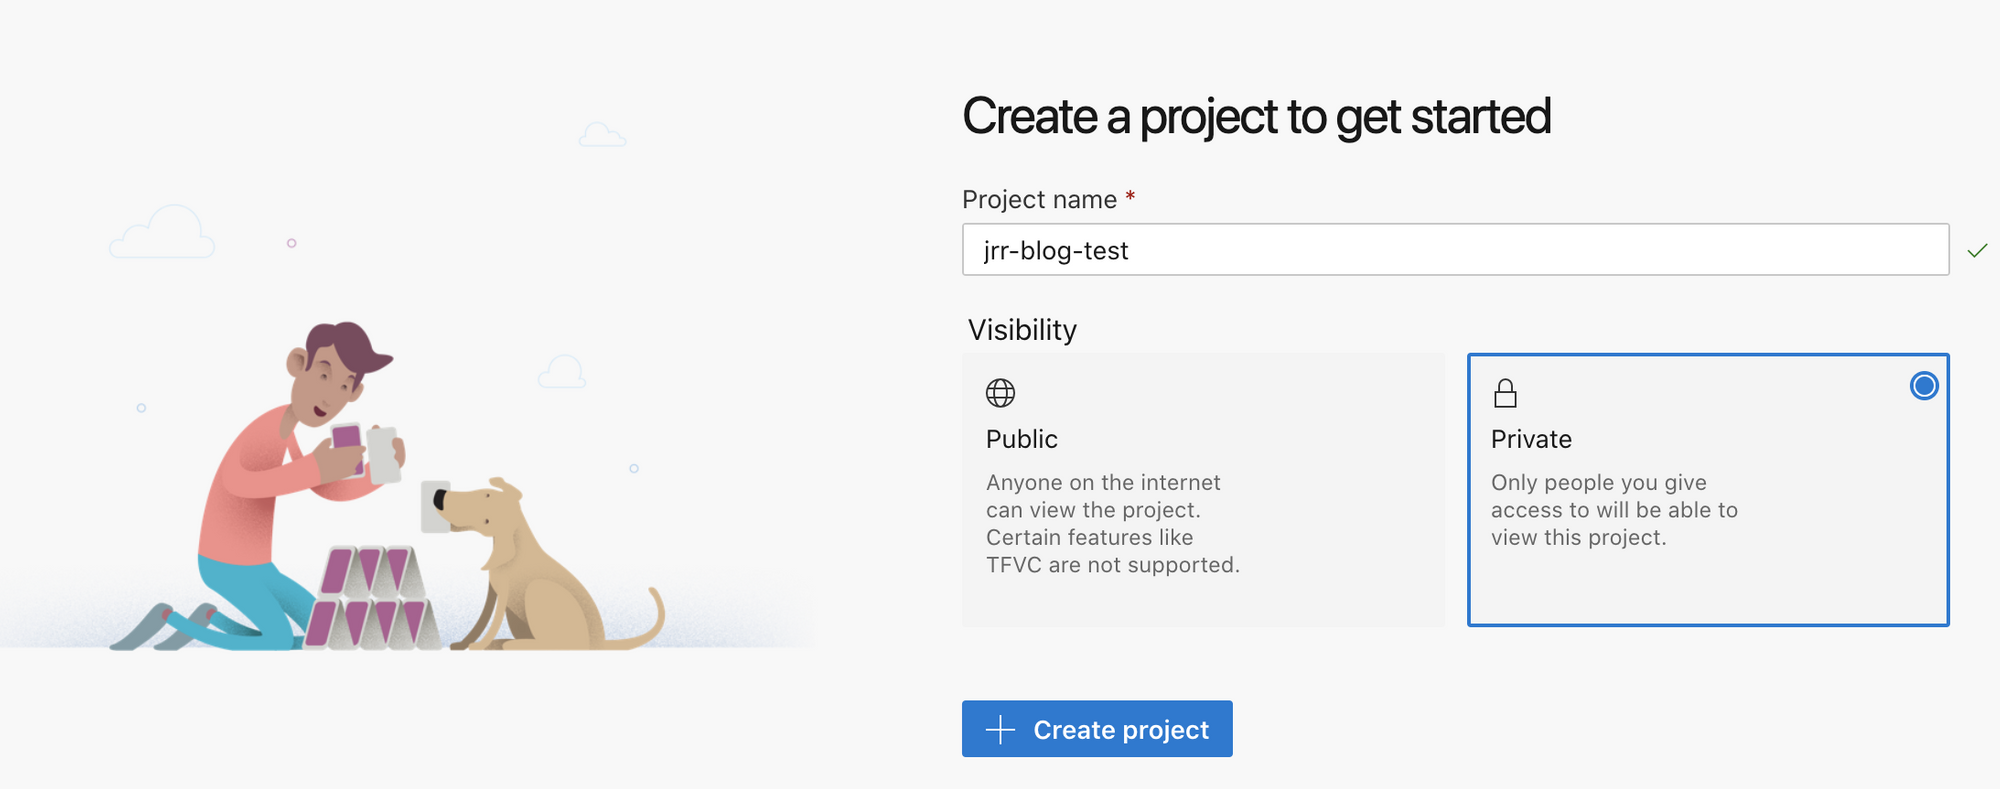
Azure DevOps is free for personal projects, so it is easy to get started with CI/CD. The first step is to create a new organization and project.
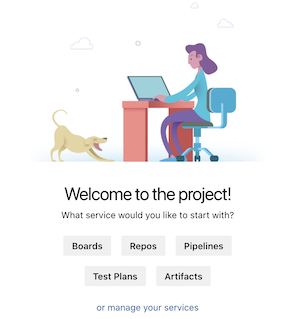
Use the Repos button to add a new repo
Copy the repo clone url from the new repo page
Navigate to your local react app folder in a command window, and run the following from the command line (assuming you have git installed)
git init
git add .
git commit -m 'Initial commit'git remote add origin <your clone url>
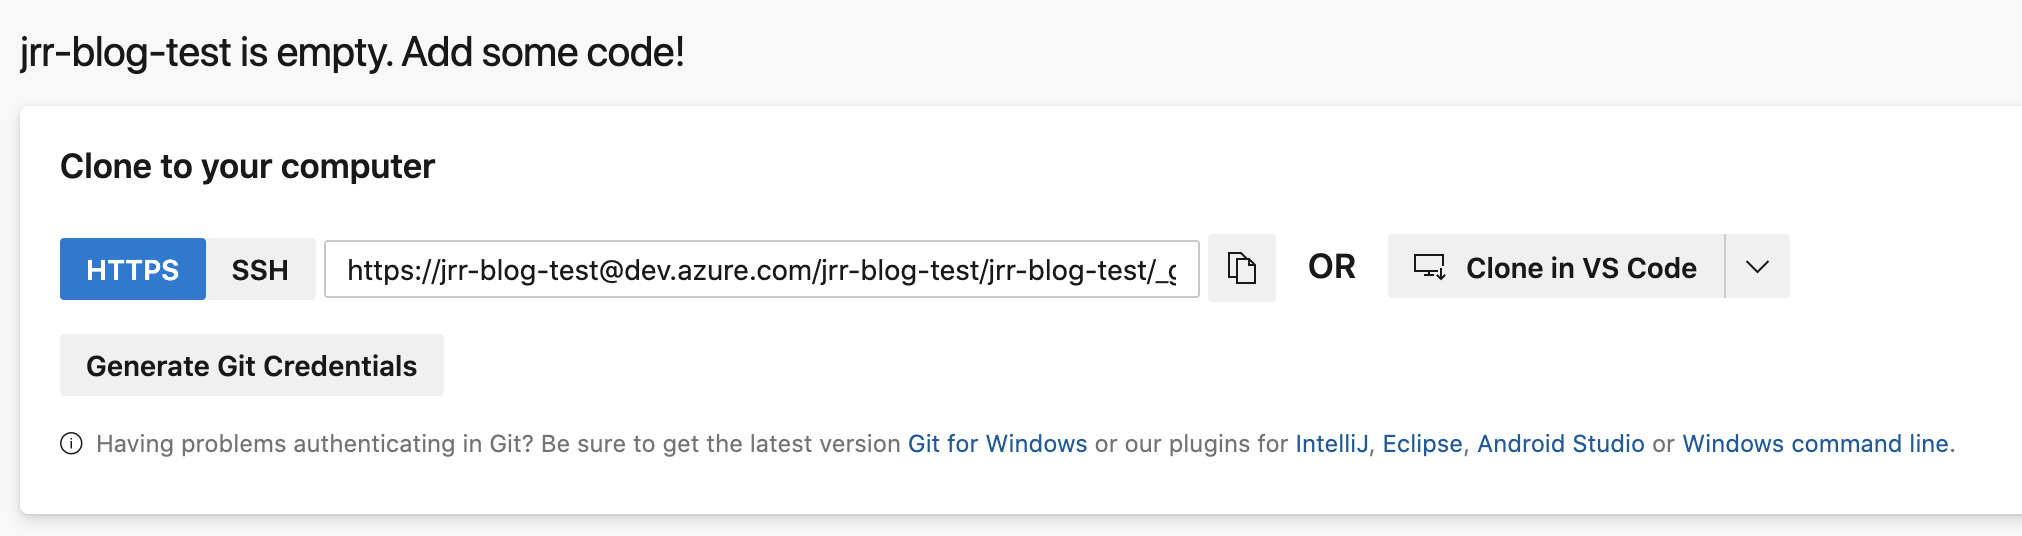
git push --set-upstream origin masterYou will be asked for the password as shown below. Use the Generate Git Credentials button below the repo url (in the figure above) to get the one-time password

That’s it to get the repo ready in Azure.
Step 5: Create a Build and Deploy Pipeline
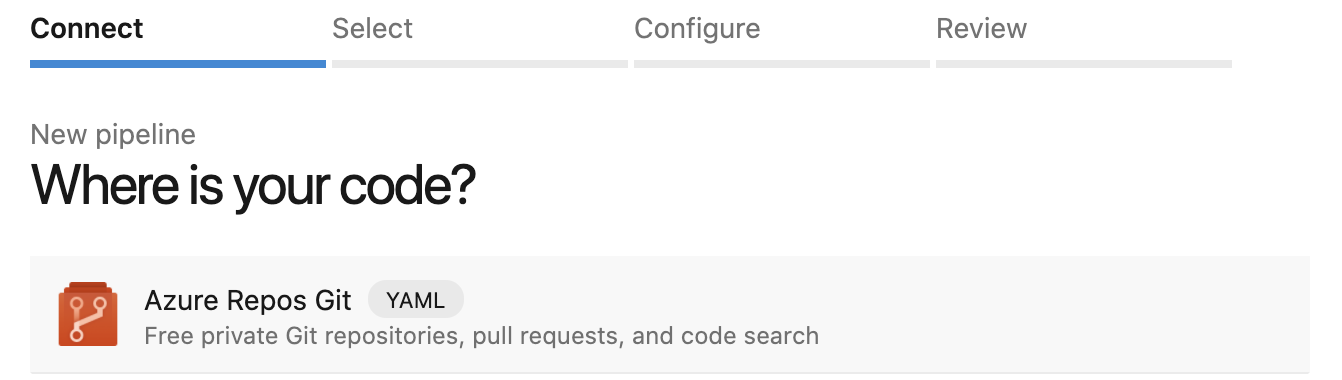
In Azure DevOps, use the Create Pipeline button under the Pipelines tab to create the build pipeline

Select Azure Repos Git as the source code repo,
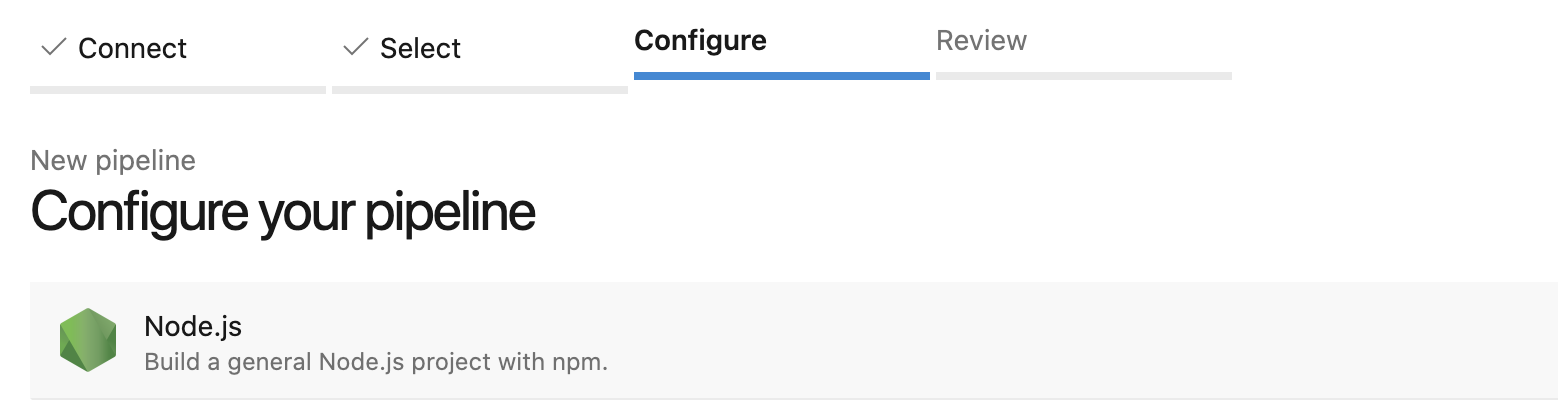
select your project, and then move on to the configure step. Pick Node.js as the project type:
This is the basic pipeline yaml that you will be presented with:

Click the Show assistant button on the right to pop out the panel used to add a new step for the deploy. Click on the Azure App Service Deploy task to add a deploy task to the pipeline. The panel displays the settings needed as follows:
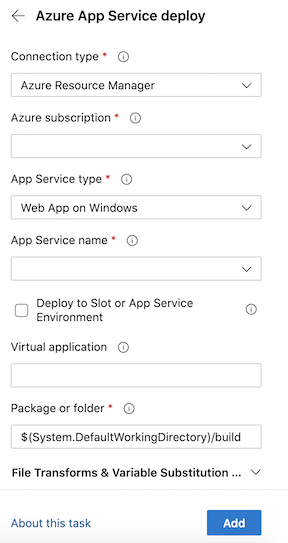
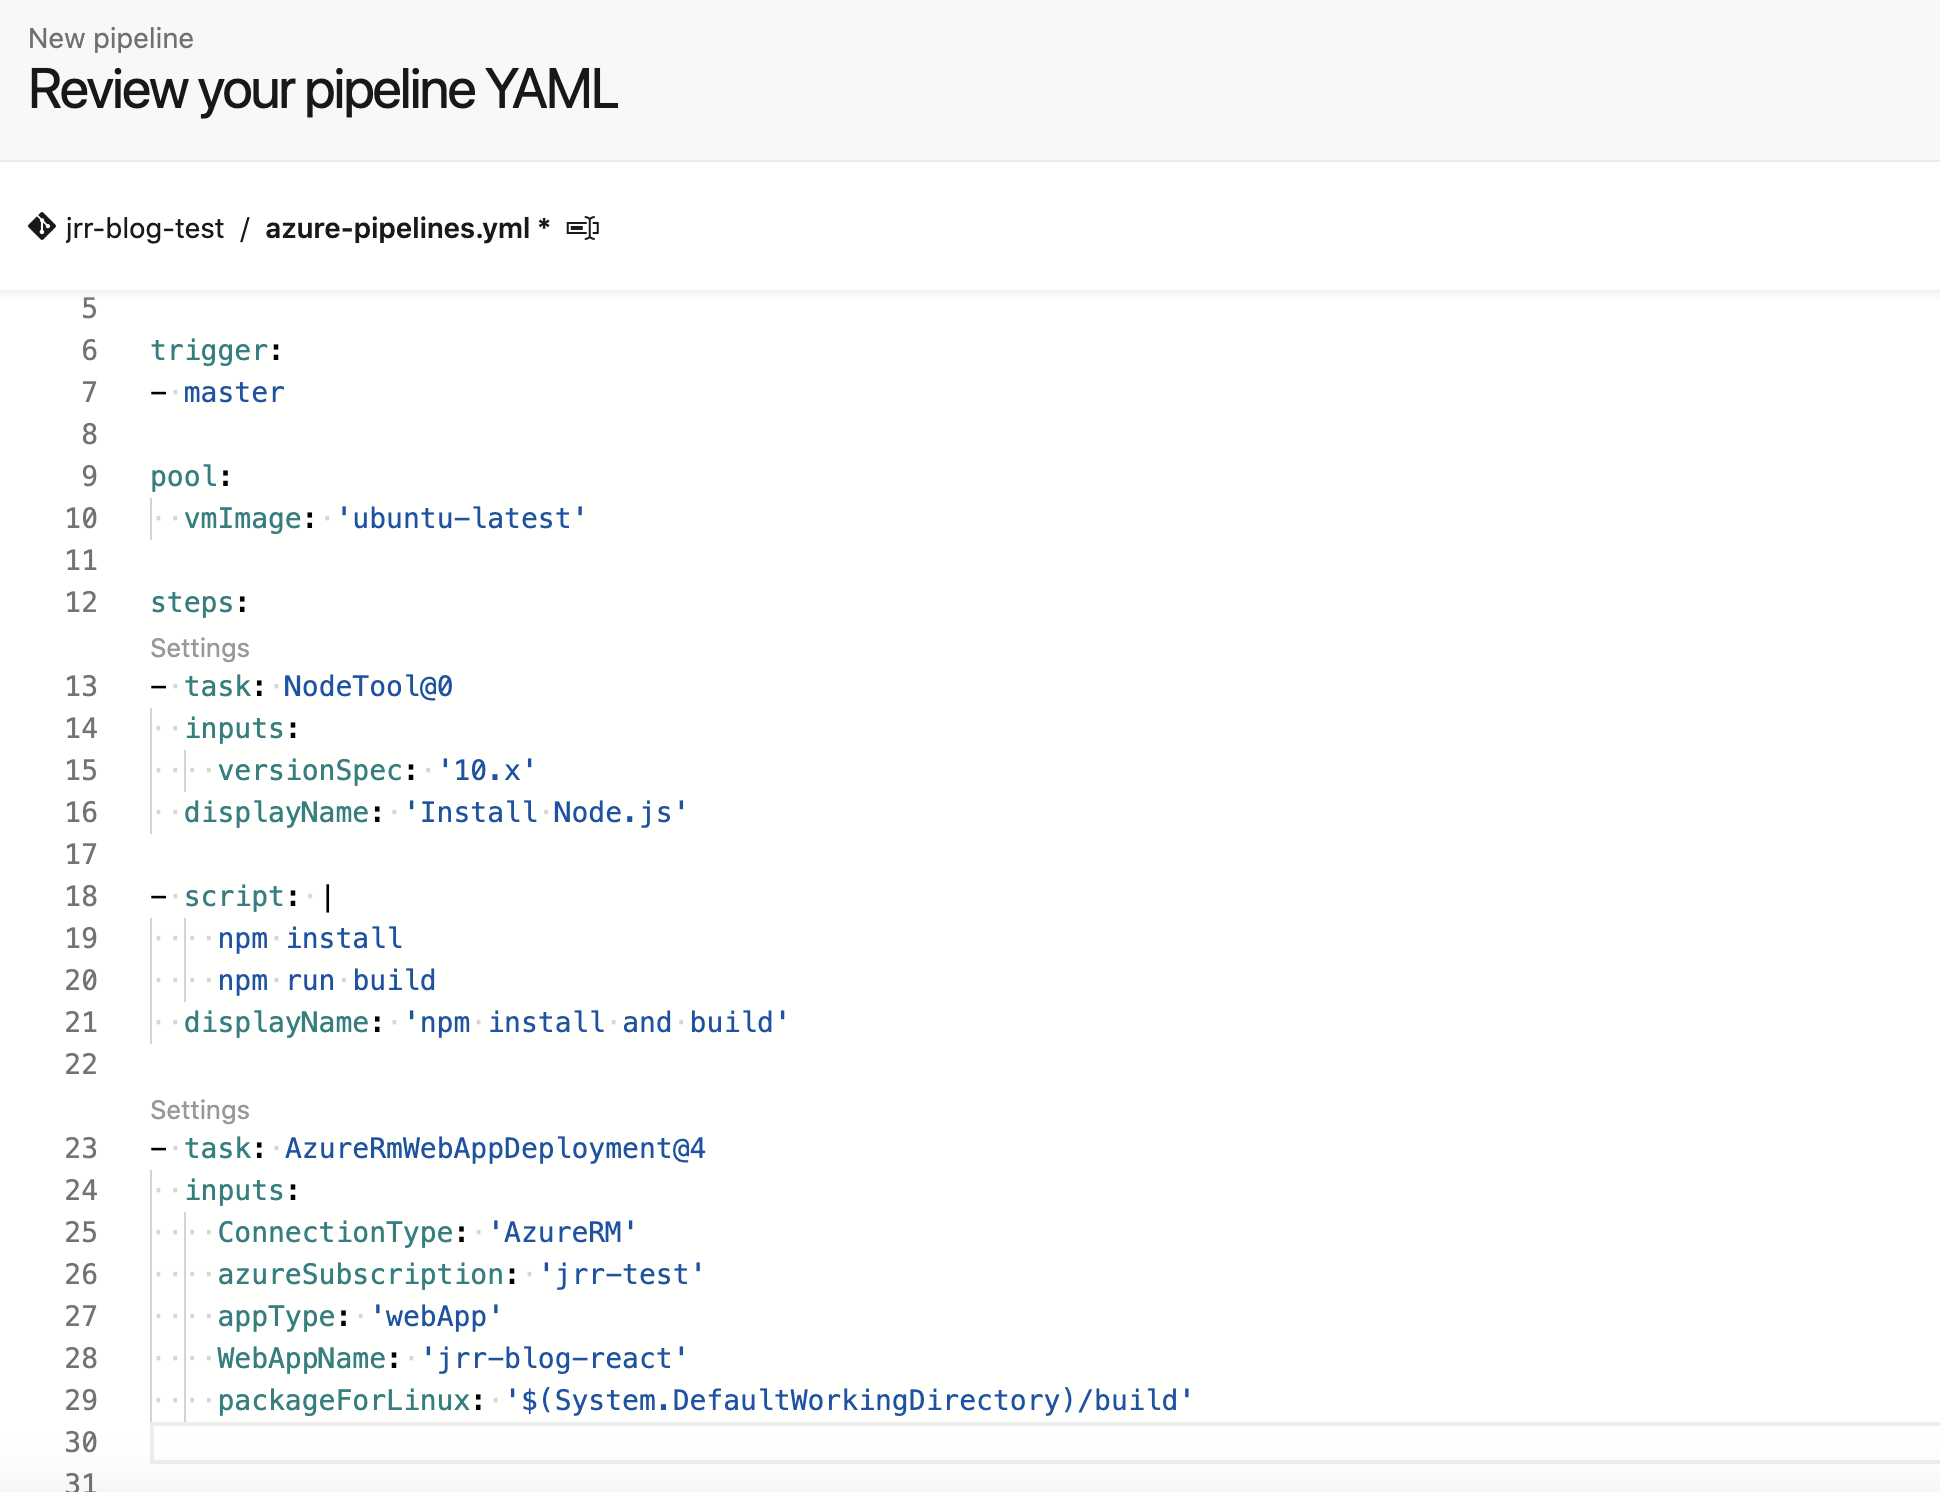
Pick the subscription you used to create the app service in step 2., and click on the Authorize button that is shown. This is an important step, since you will need permission to create an Azure Active Directory Application to be able to complete the step. Once the authorization is successful, you can pick the app service that you created in step 2. Under the hood, the step creates a service connection from the Azure DevOps project to the Azure resource group, to be able to deploy the code to the app service. If this step fails for some reason, you can edit the service connection from the DevOps project settings or you can add a new one. This is what my pipeline yaml looks like after adding the deploy step (my service connection was called jrr-test):
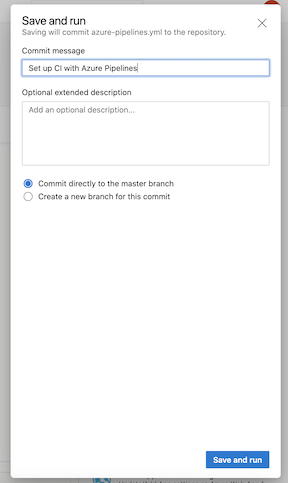
Click the Save and run button on the upper right, retain or change the default commit message, and click Save and run again:
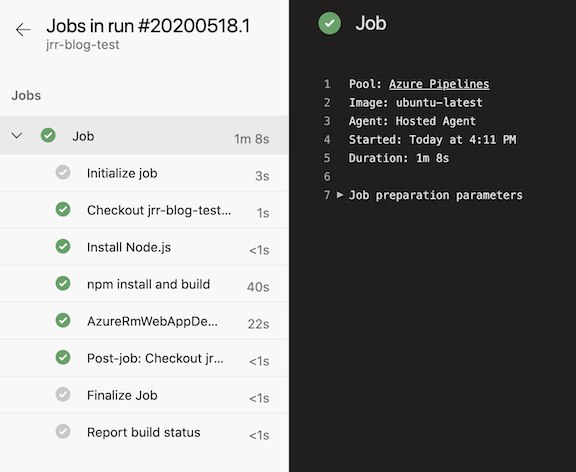
That’s it. The pipeline should now run, build the code, and deploy to the Azure app service.
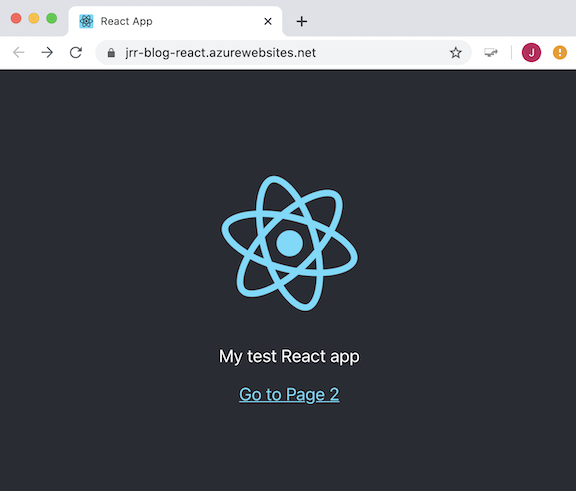
I had made some changes to the code, so my newly deployed web app looked like this after the pipeline ran:
Any new change pushed to the Azure repo such as
git commit -m 'My new change'
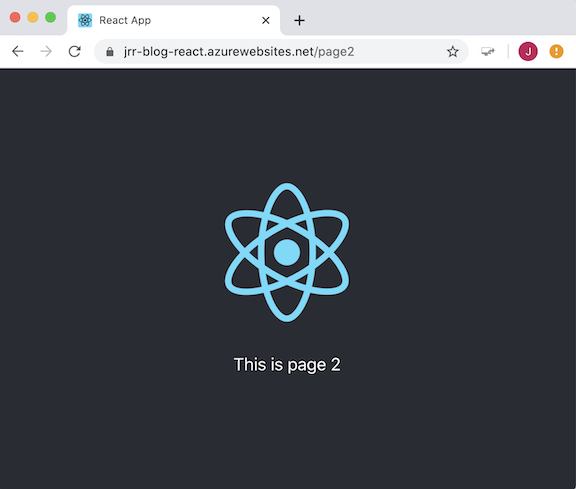
git push origin mastershould trigger a build and deploy the website to Azure for immediate external access.
Taking big ideas sky-high.
Explore our case studies to see how we elevate cloud solutions like never before.